Making a cedar dining table
Our old dining room table had become very rickety and worn out so we decided to replace it before it fell apart at a dinner so we decided to build our own and customize it to our liking. I have years of woodworking knowledge along with years of general fabrication and welding so I figured it was time that we put those skills to use for ourselves for a change. We wanted to make something durable and practical for the many different things we would be using it for besides eating and yet still say this is who we are.
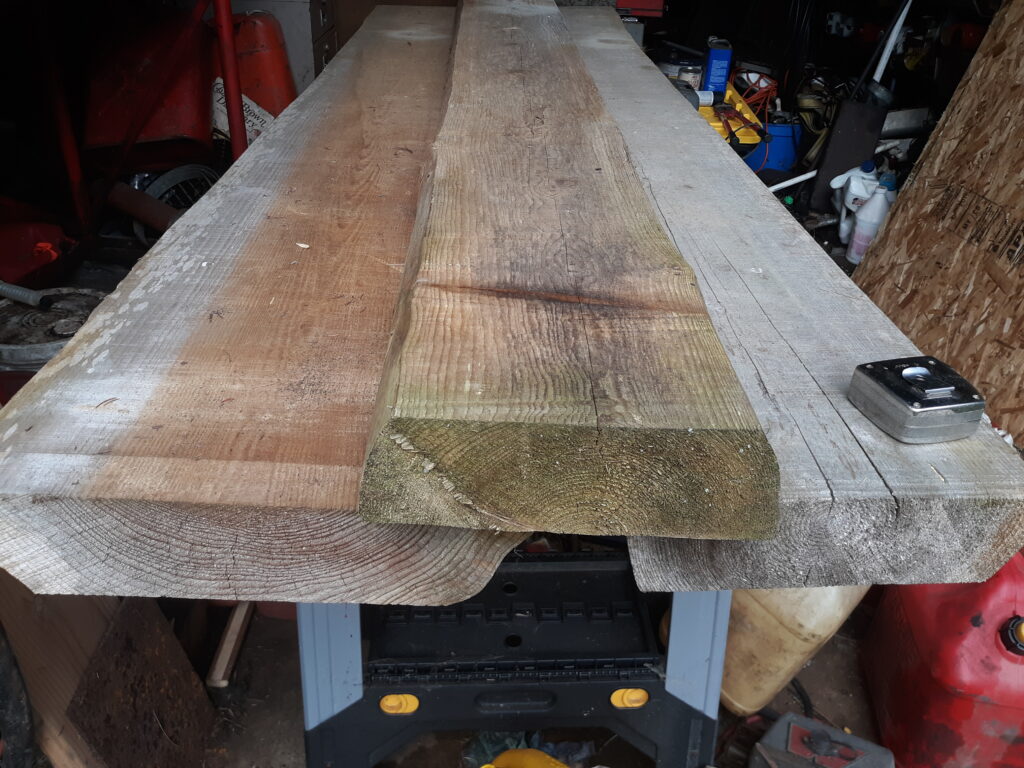
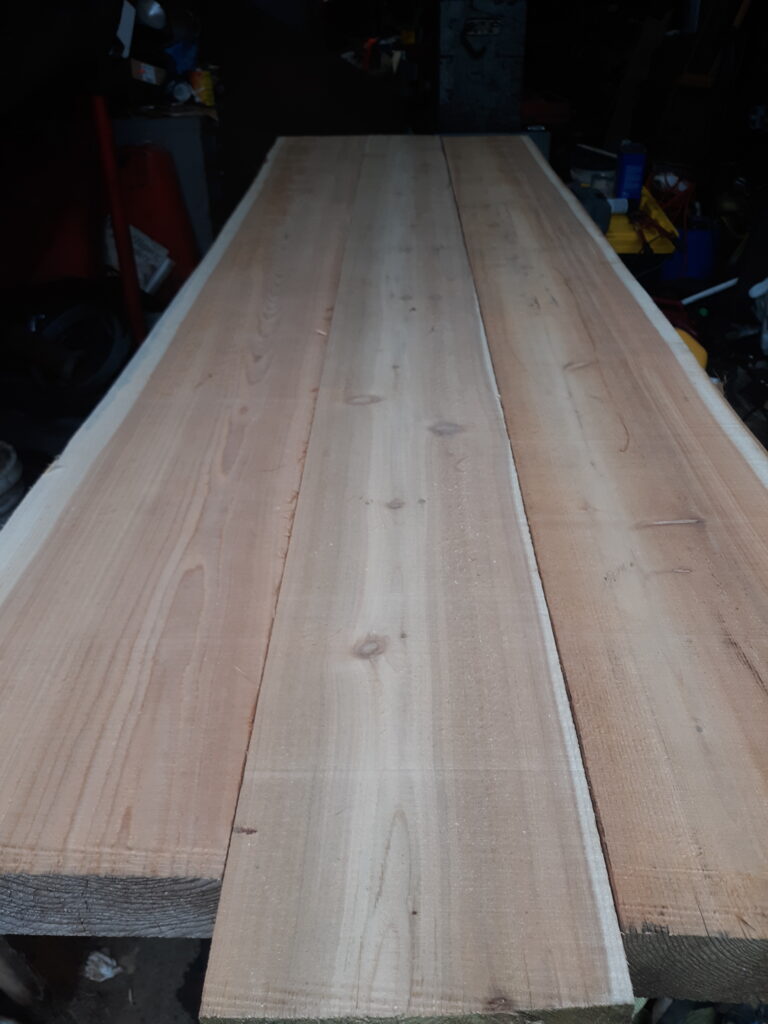
We fell several Western Redcedar trees a few years ago and I used the Alaskan Sawmill to cut them into 4” thick planks so that is what we chose to make our table from since the trees came from our own property. These would have been expensive boards if we had to buy them so we were very lucky to have been blessed enough to have a pile on hand that only costs us some time and chainsaw gas. All the planks have been slow drying for several years so they were ready to go without any extra prep work.
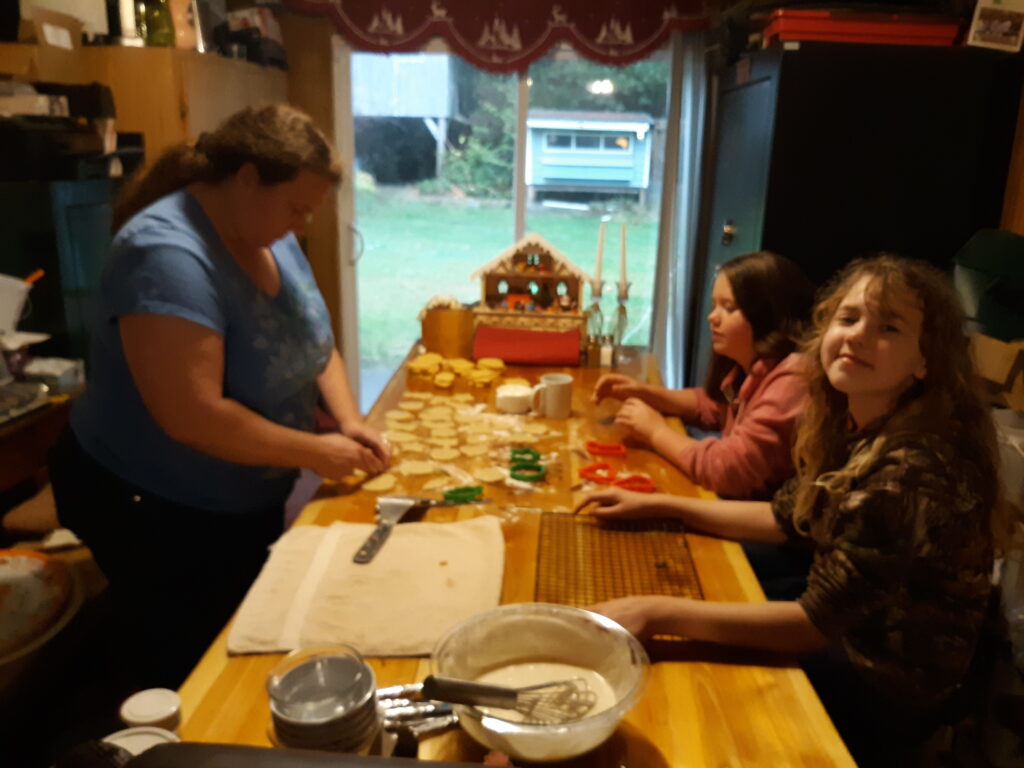
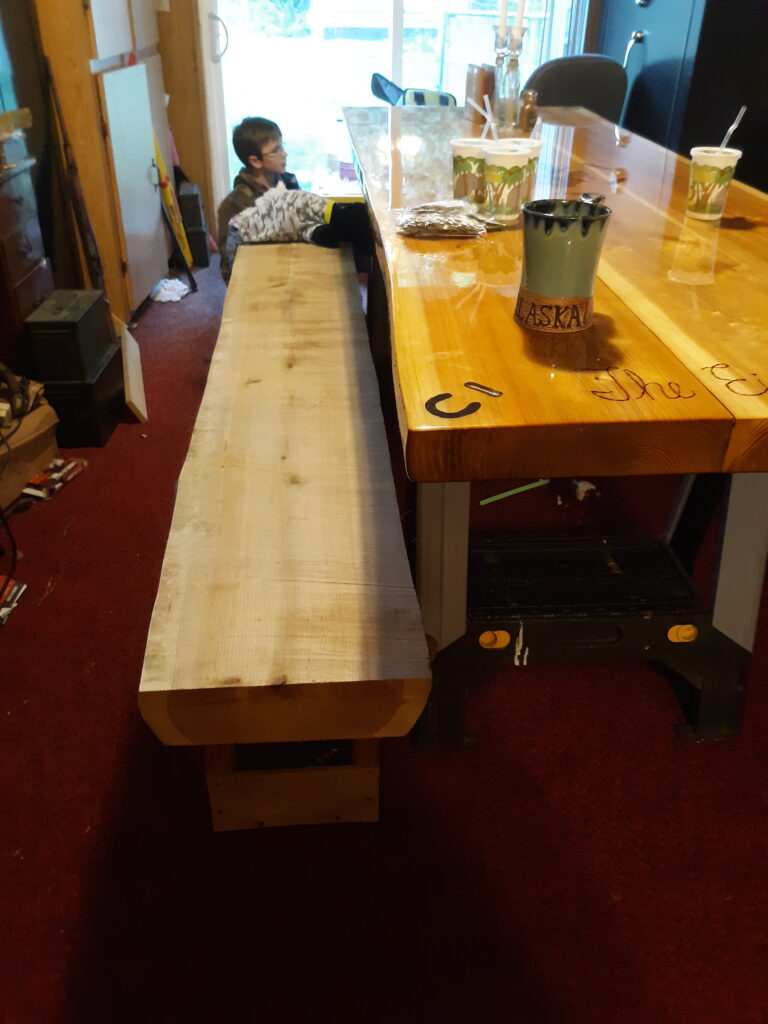
The table is used frequently for game processing, sausage making, making jellies, canning, and a variety of other things so we decided to make it higher than a standard table so we could easily use it to work on those things without our backs getting as sore. We planned on using benches instead of chairs so we would just build those a little taller to make up the difference later. Yes, an eight-foot-long bench can be a pain for the people in the middle, but in our defense, we generally do not have too many people at the table unless it is a holiday dinner.
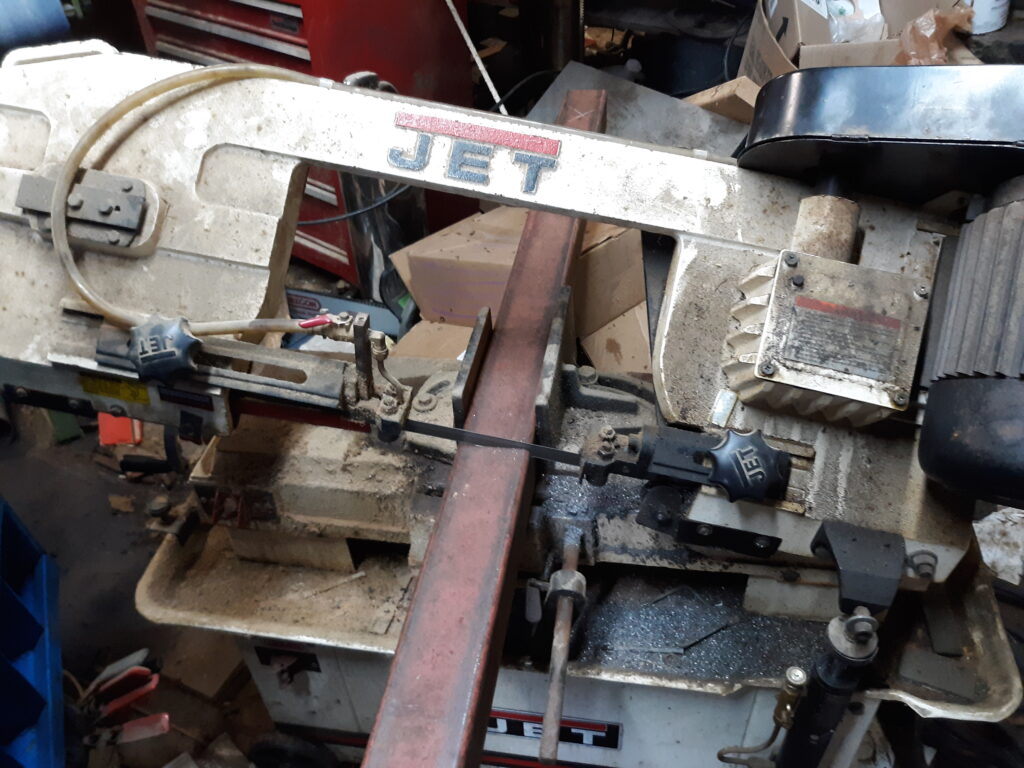
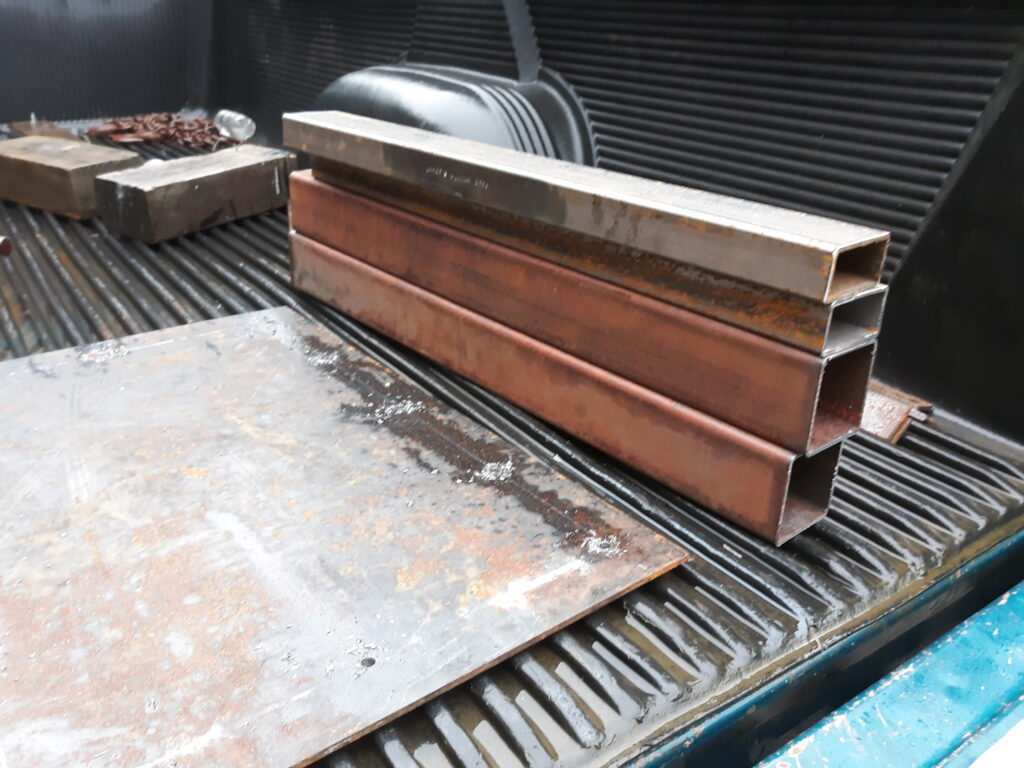
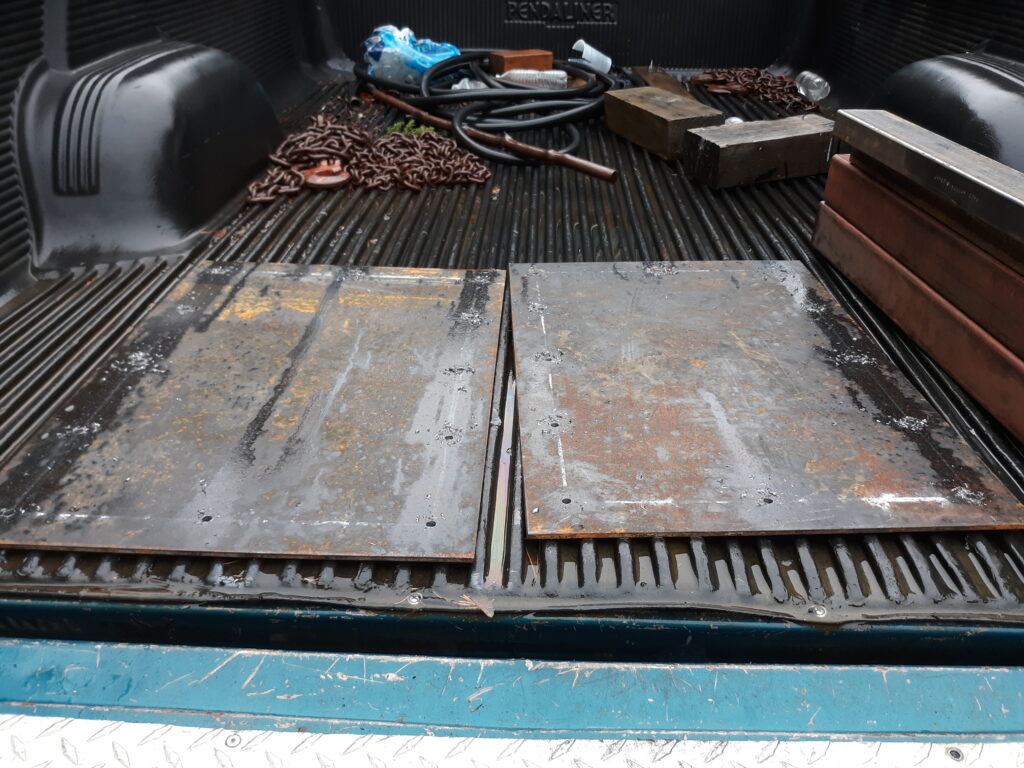
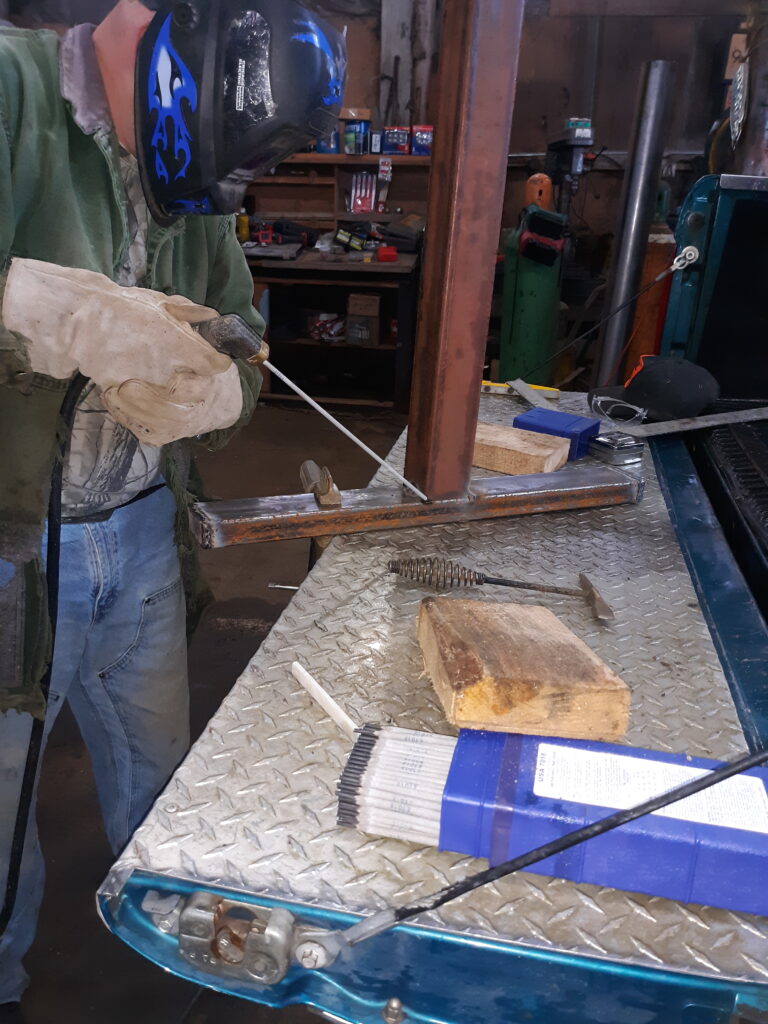
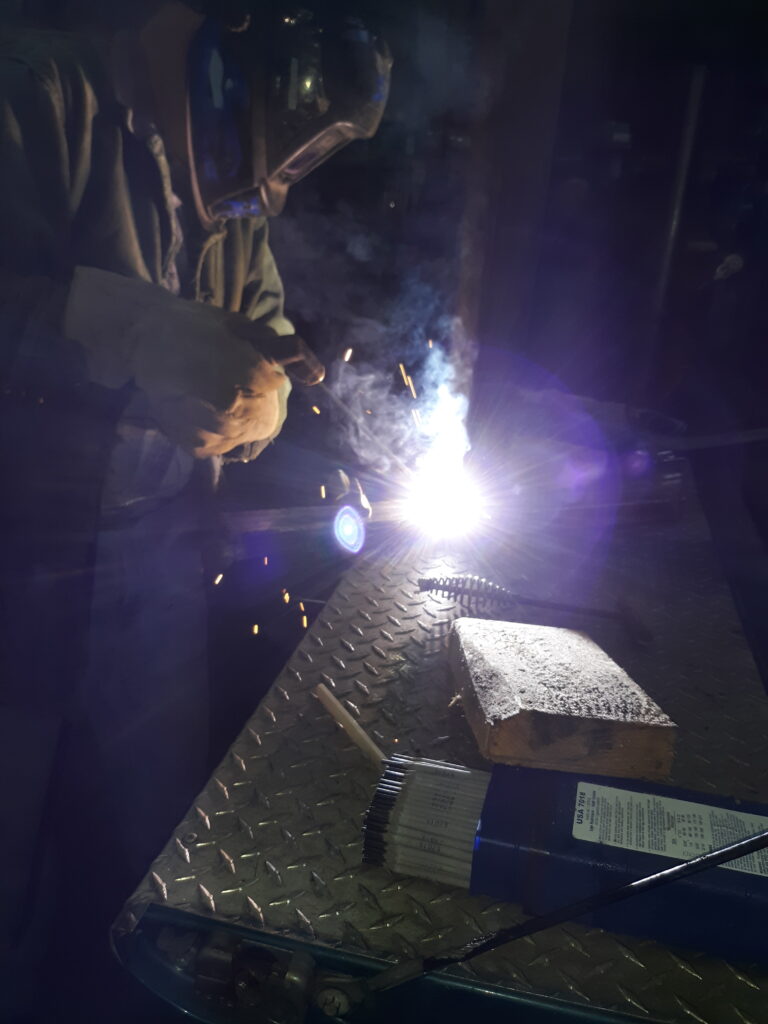
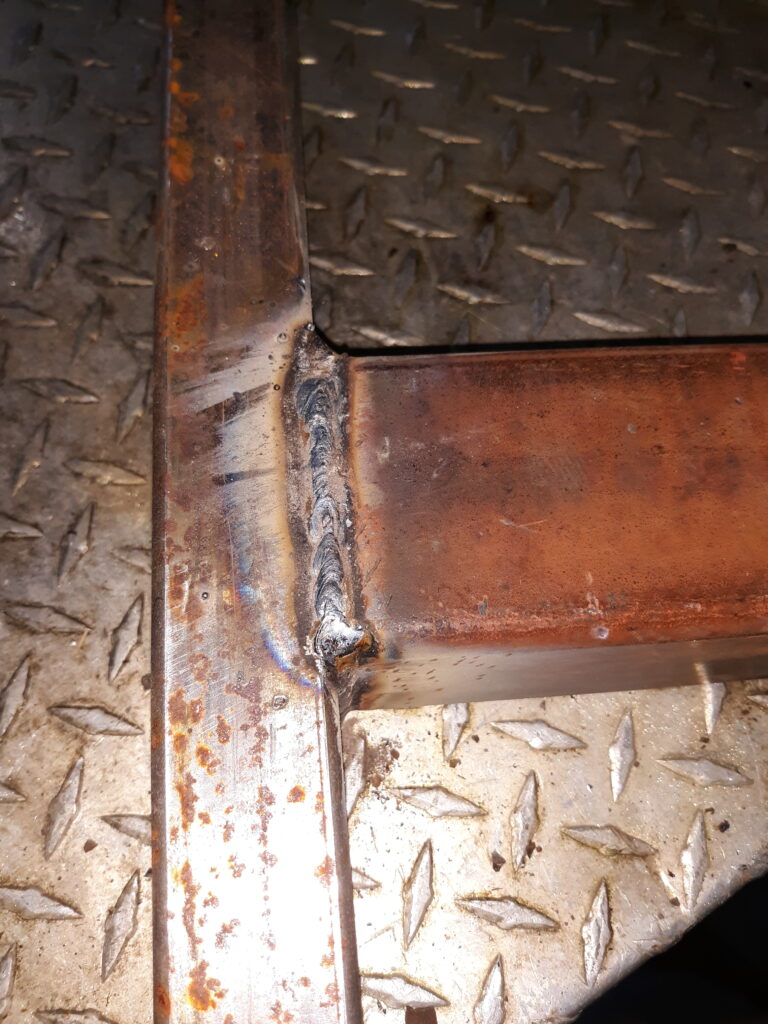
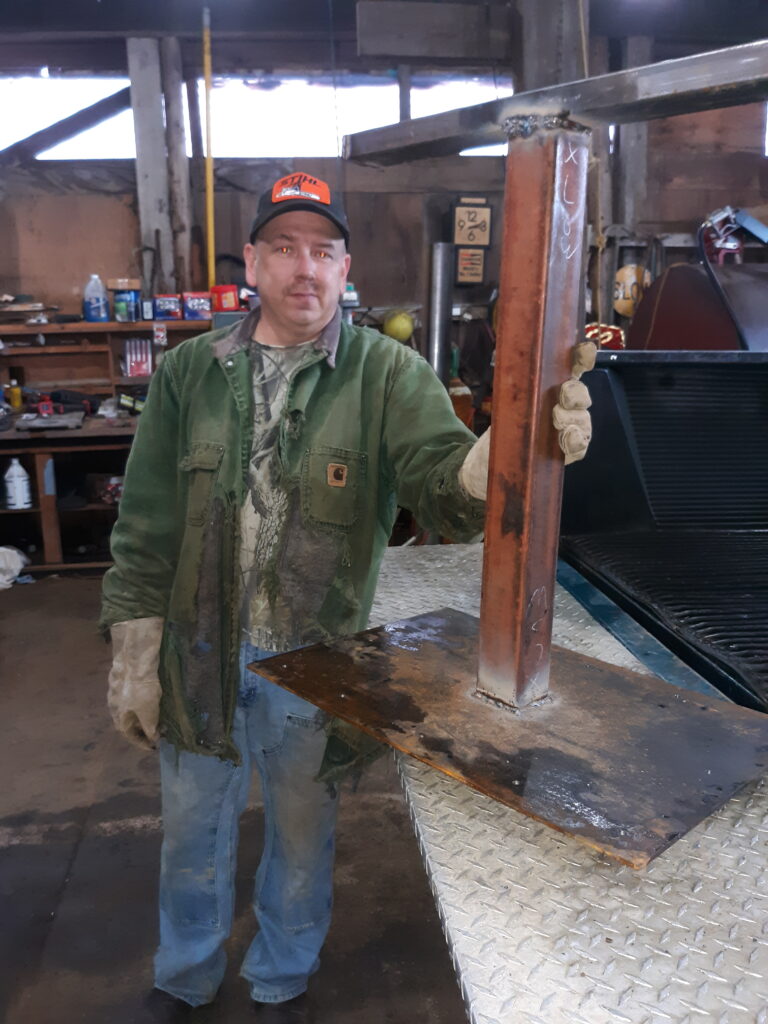
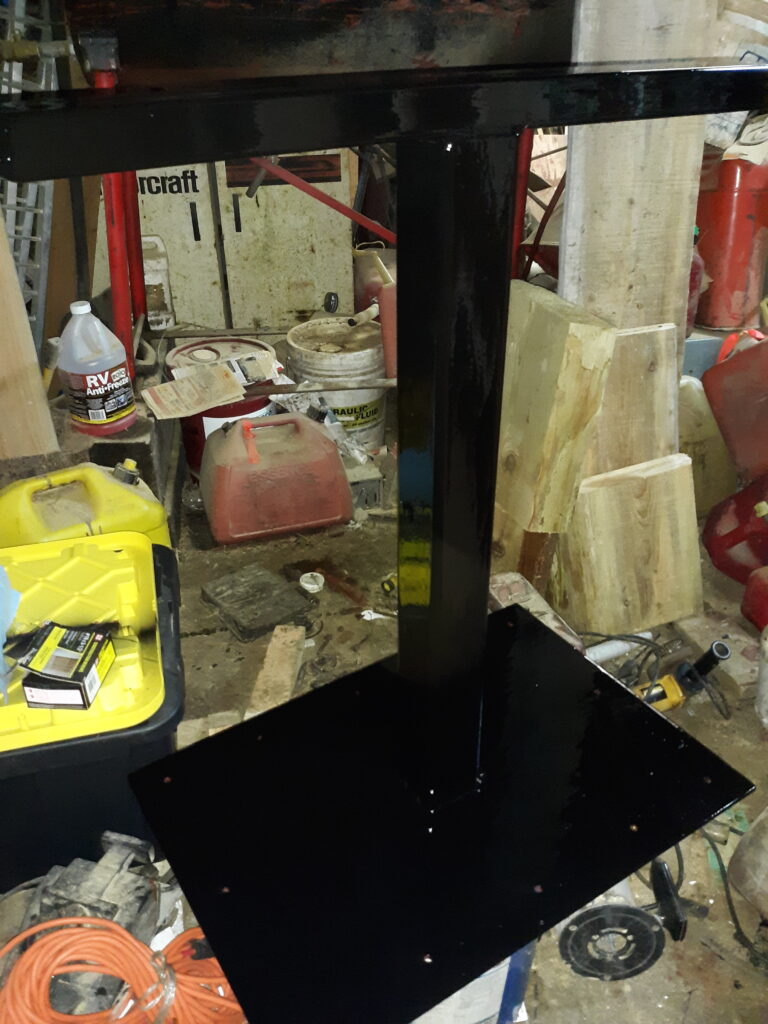
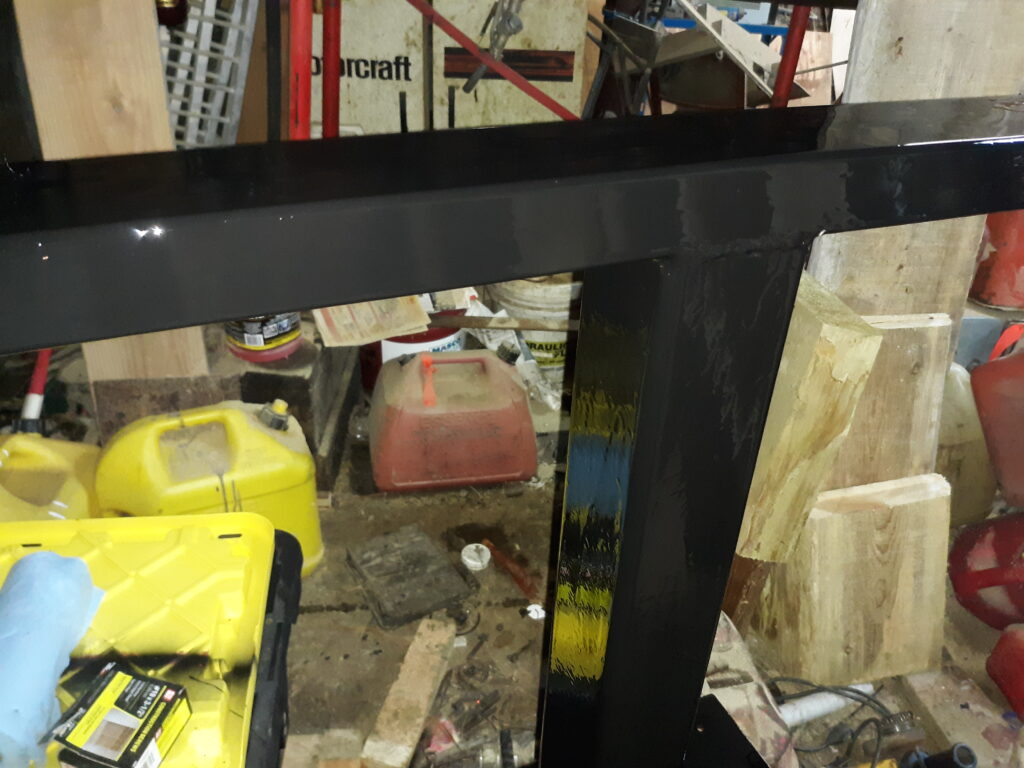
Since this table was planned to be eight feet long and yet narrow enough to not take up the walking path in the dining room, we decided to use steel legs to get the strong support while still allowing plenty of room not to bang your knees on the legs and yet allow the benches to nest underneath it completely out of the way. I used 2’ X 2’ ¼’ thick steel plates to make the mounting base for the underside of the table wo reduce any wobbles and to spread the load out evenly for the biggest area possible. The steel has a lot of strength for its thickness obviously so that kept the profile low enough that we wouldn’t be banging our knees on the mount at all. 3” square tube was used for the posts while a 1” X 3” rectangular tube was used to make the feet with. The metal bandsaw and welder definitely came in handy this time since the bandsaw make perfect square cuts every time. Two coats of primer and oil-based finish enamel finished off the legs. It added about 100 pounds to the project but it was well worth it for the low profiles to keep from banging our knees on it.


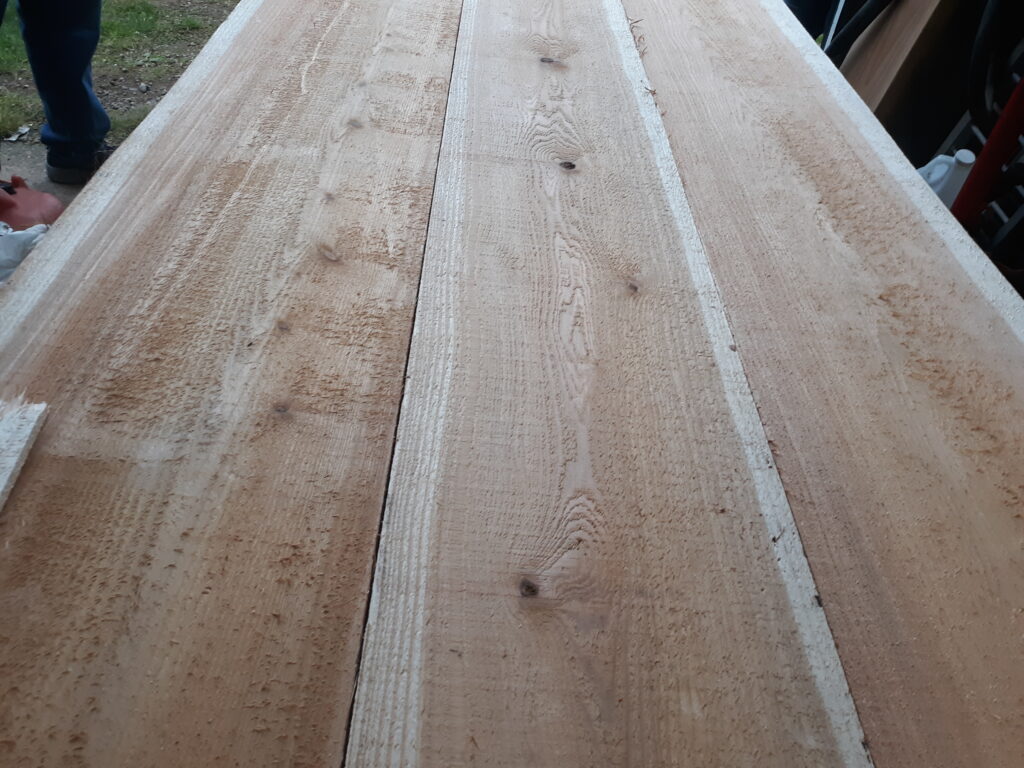
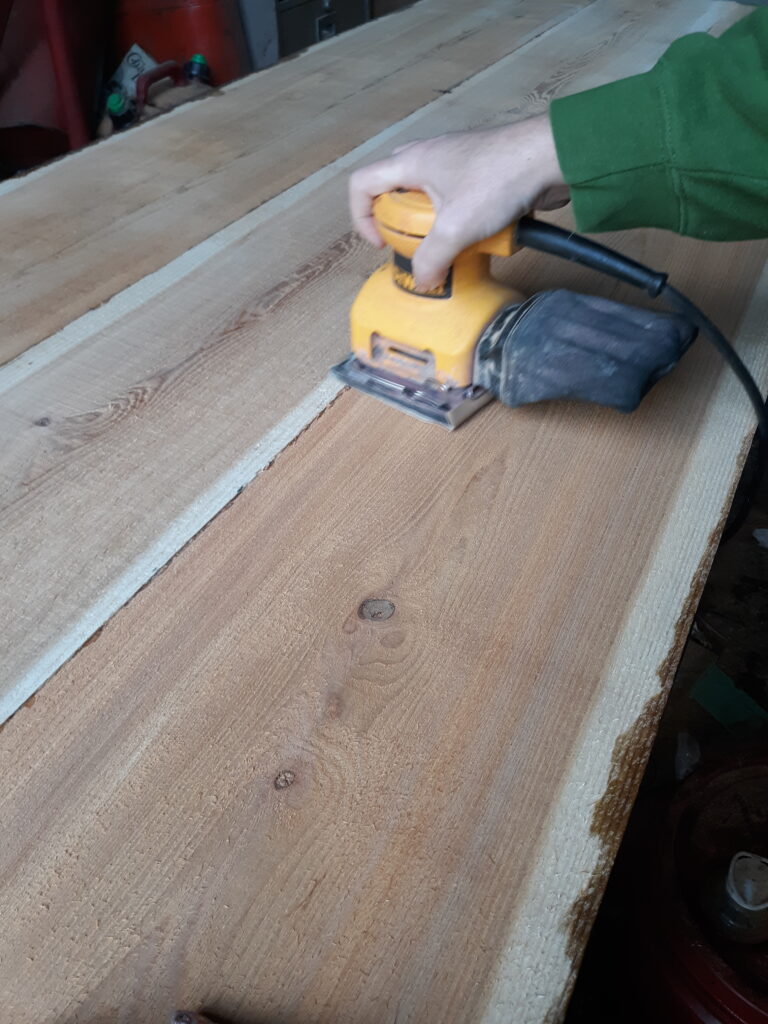
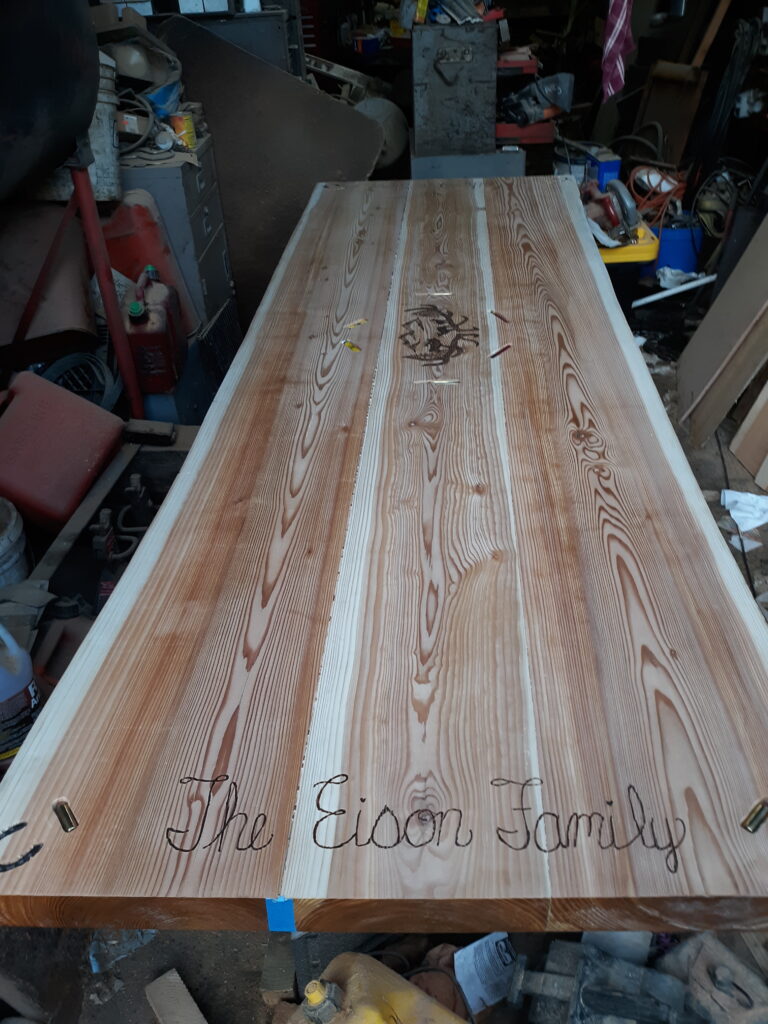
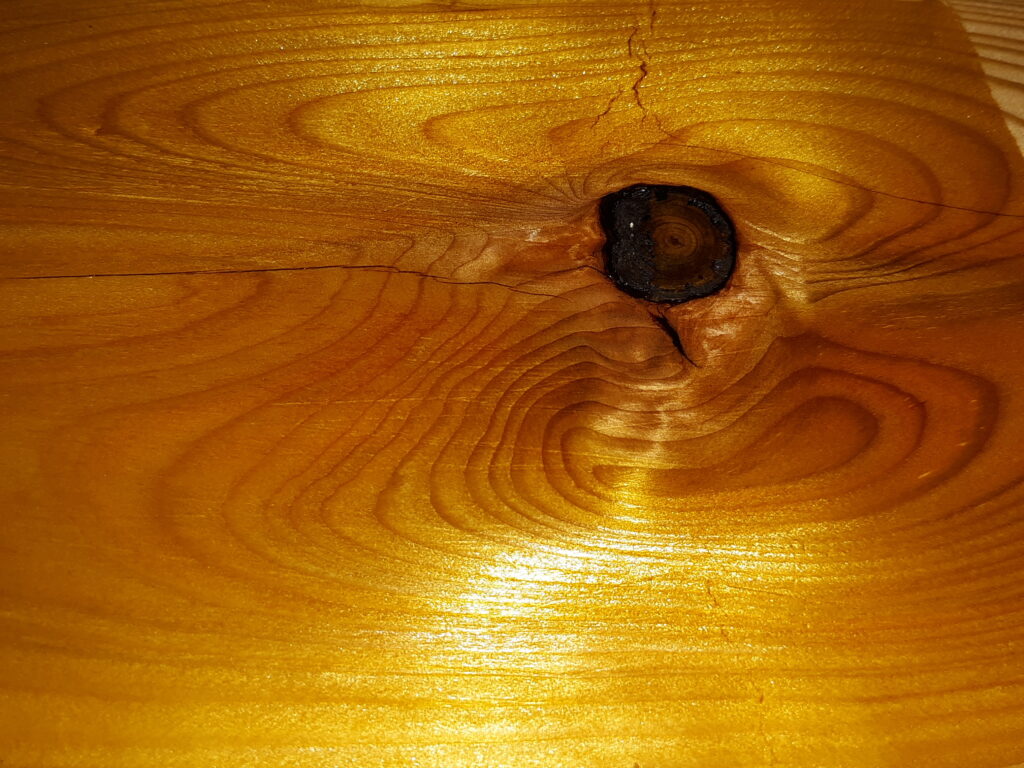
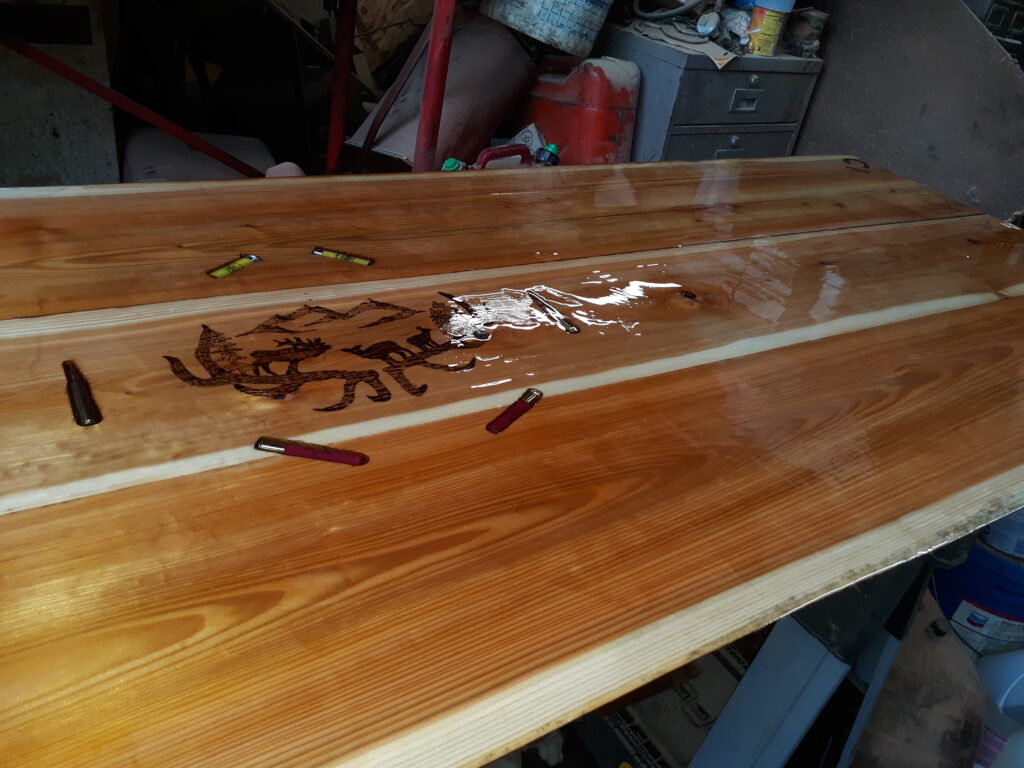
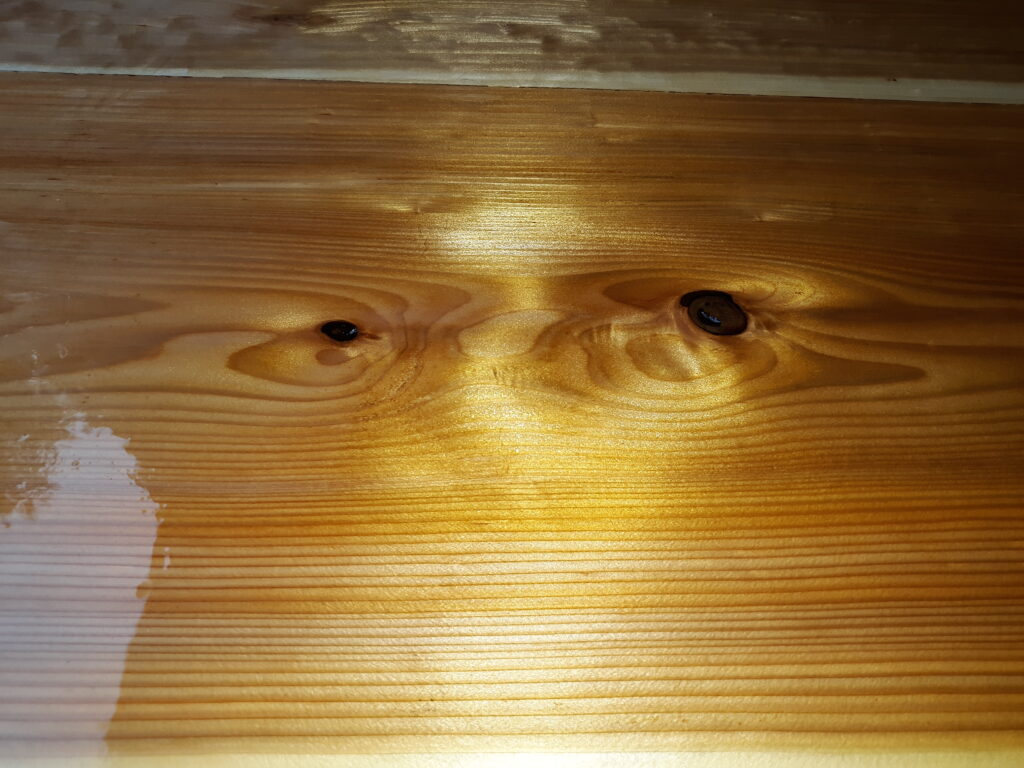
I selected the three best planks that had good appearance characteristics and totaled about 32” wide for the finished width of the table. We planned on leaving the live edge on the outside edges of the table so I took that into consideration for the overall width. After squaring and cutting all the interior edges the boards were all glued together and a sheet of ½” plywood was used to hold them together and provide extra strength for the elk quarters later. These were 3” thick planks that were 8 ½ feet long so we let them dry for about 5 days just to make sure the glue had cured good and everything was bonded together. A coat of polyurethane was applied to the entire bottom of the table to seal it. The table top was flipped over after everything was dry so that the painstaking process of sanding it could begin. Sanding took several days to get all the saw marks out of it and to get the top 100% level. This started with 80 grit sandpaper and eventually made it down to 400 grit for the ultimate finish.
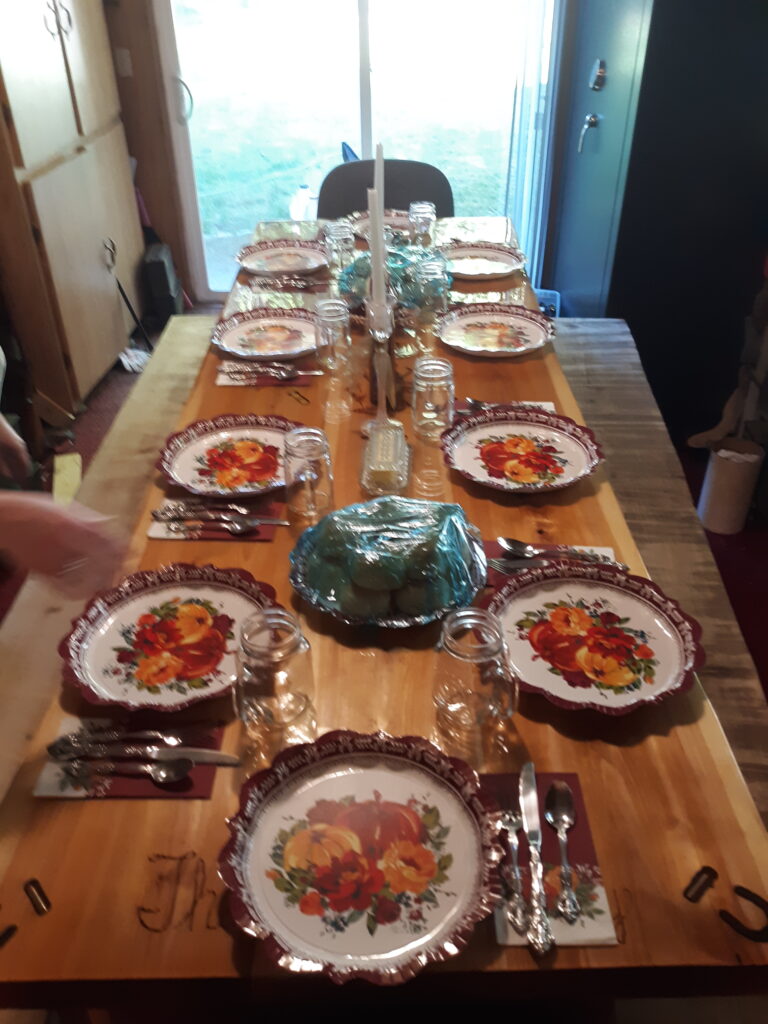
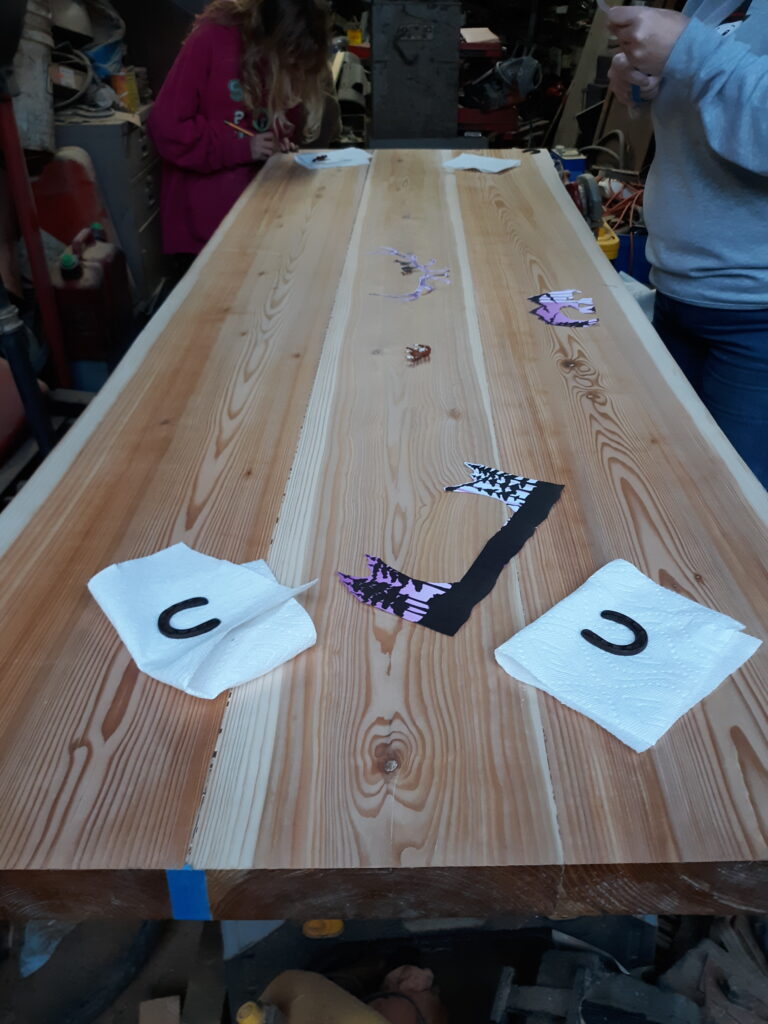
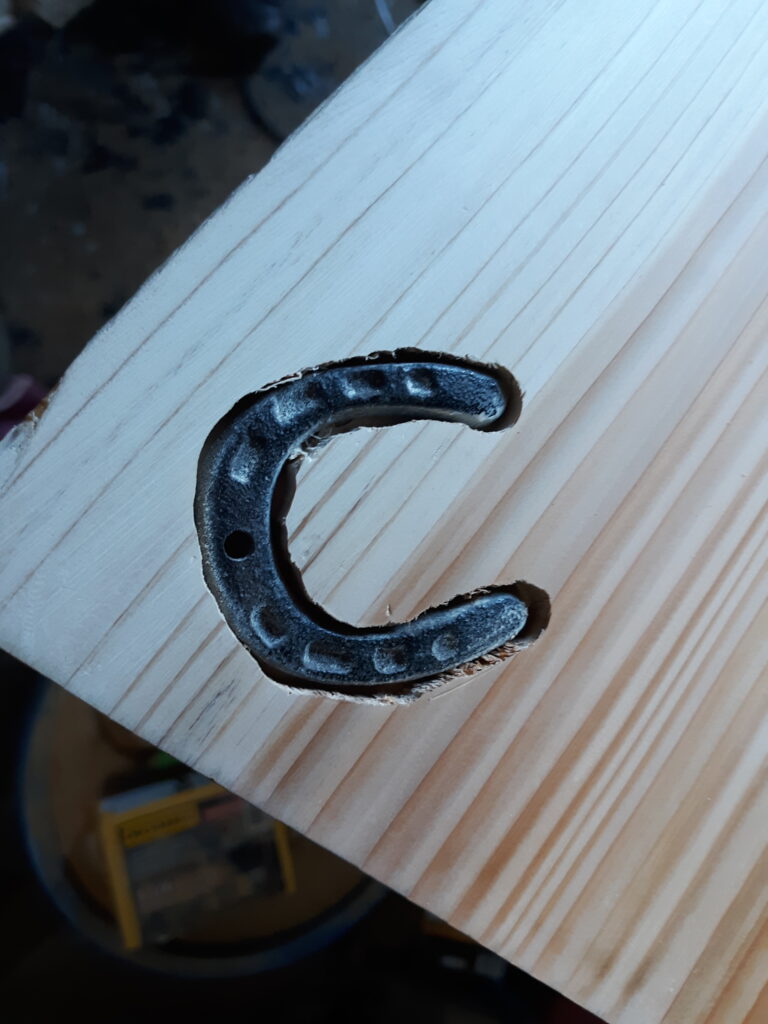
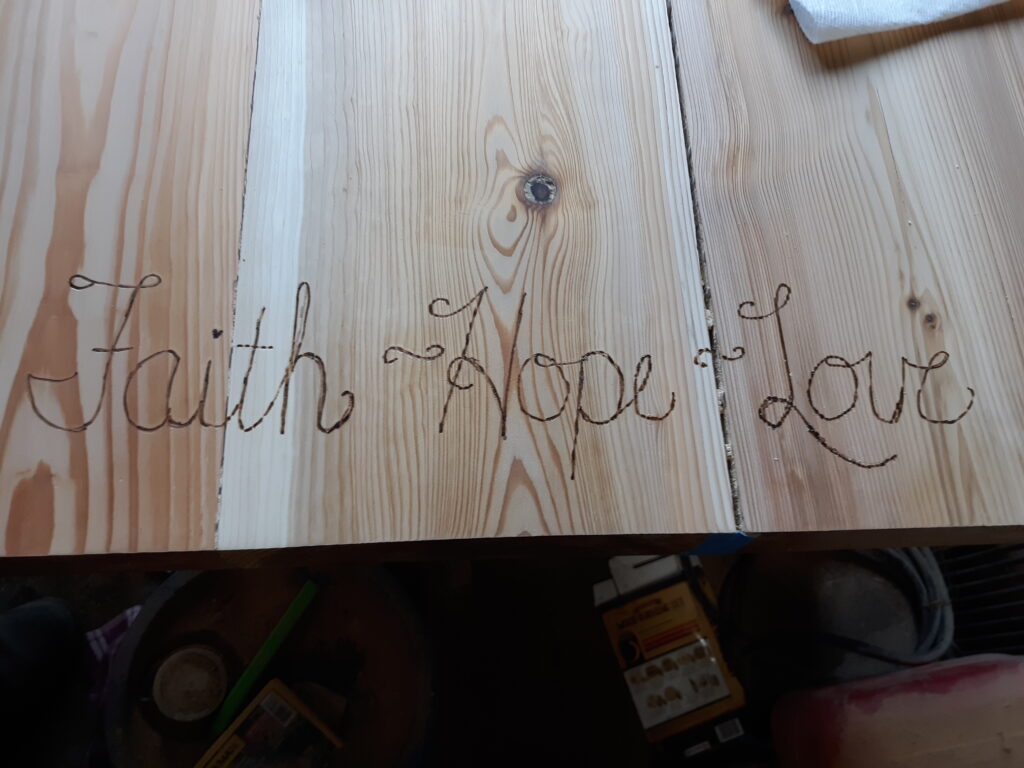
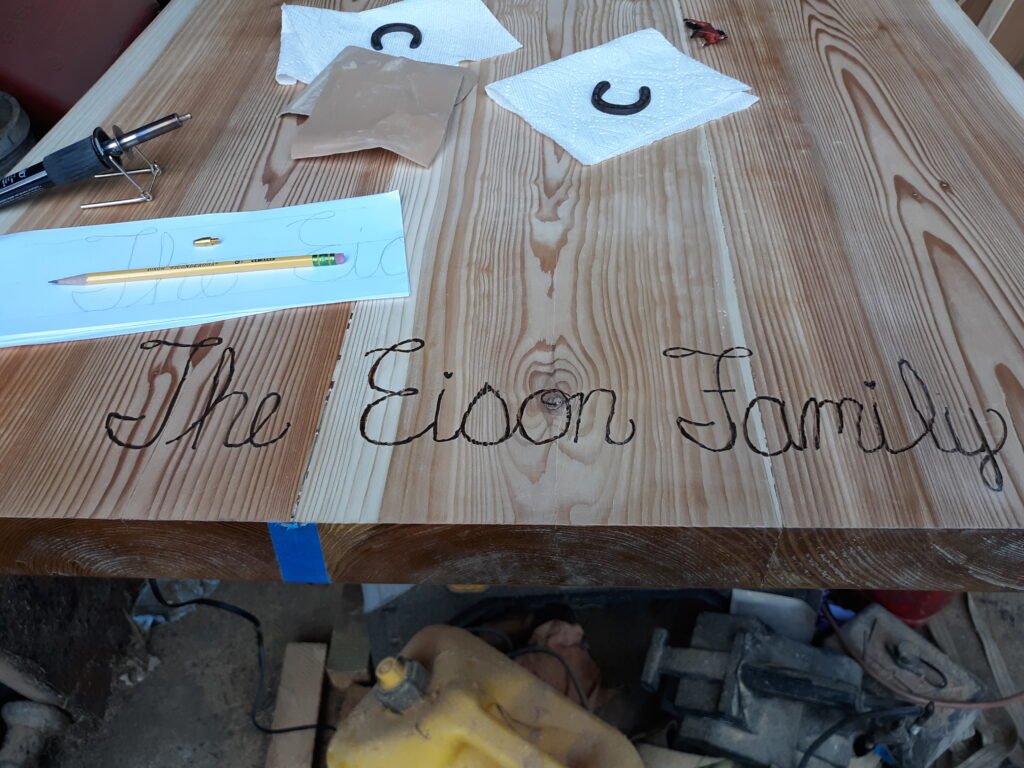
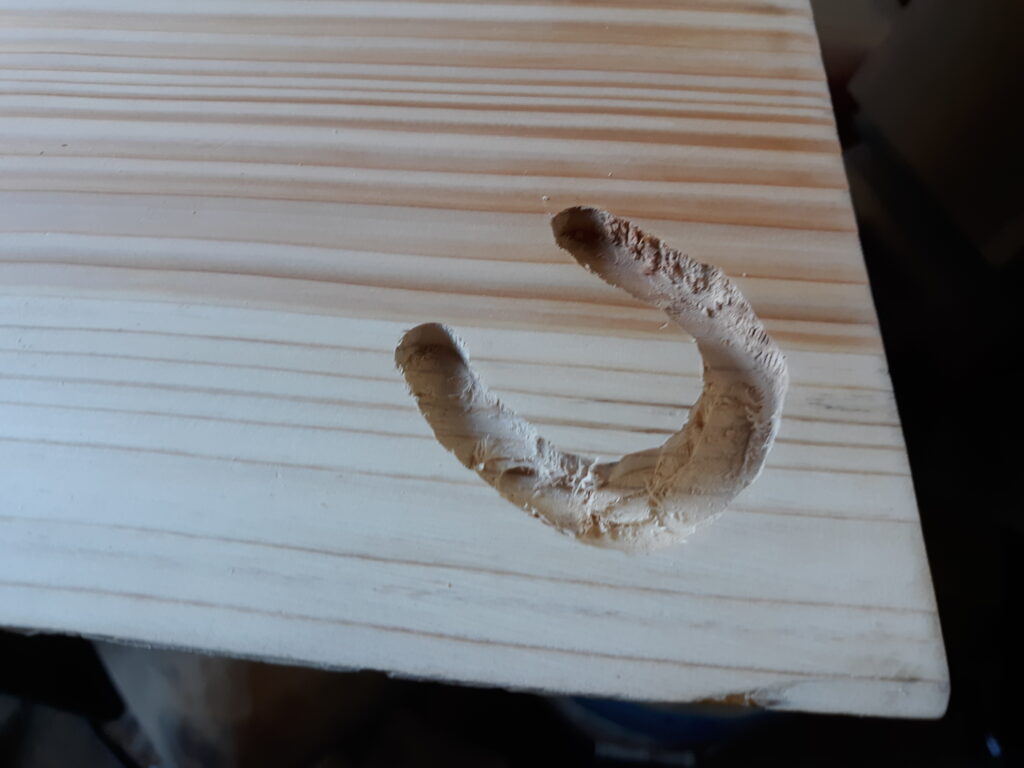
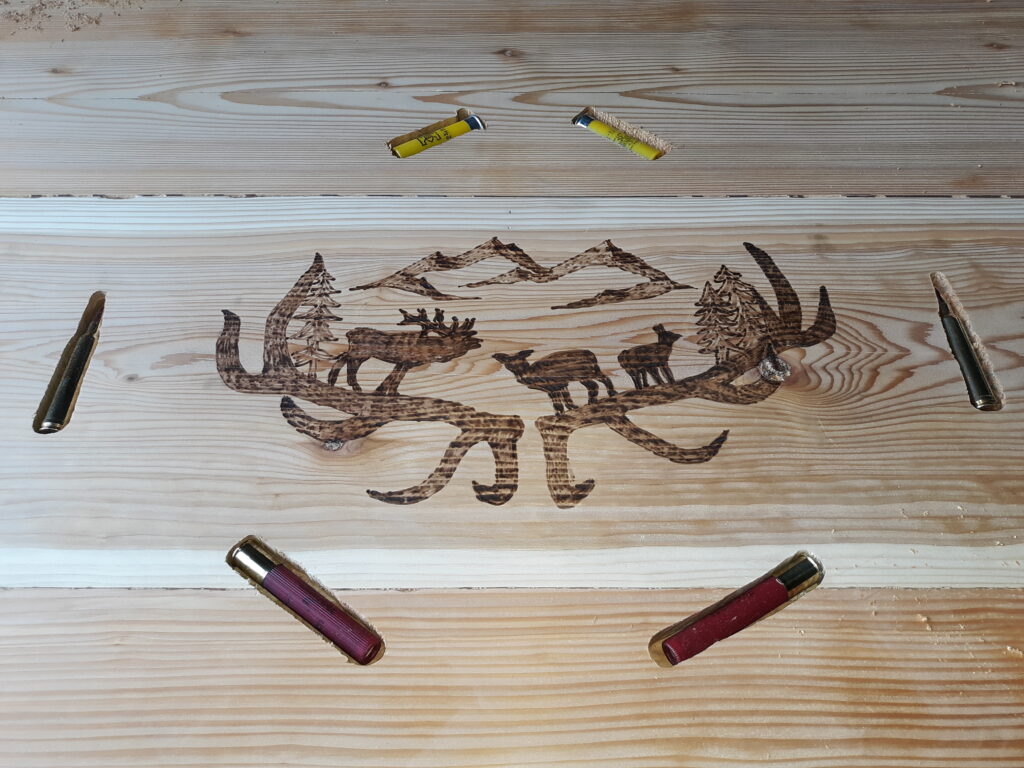
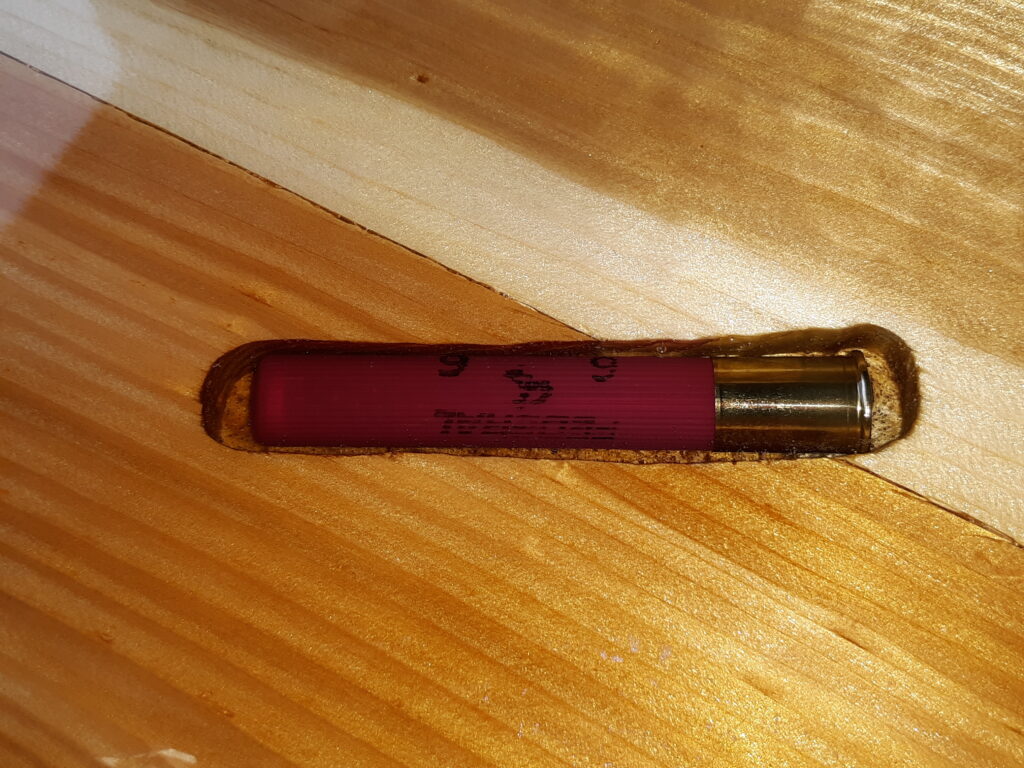
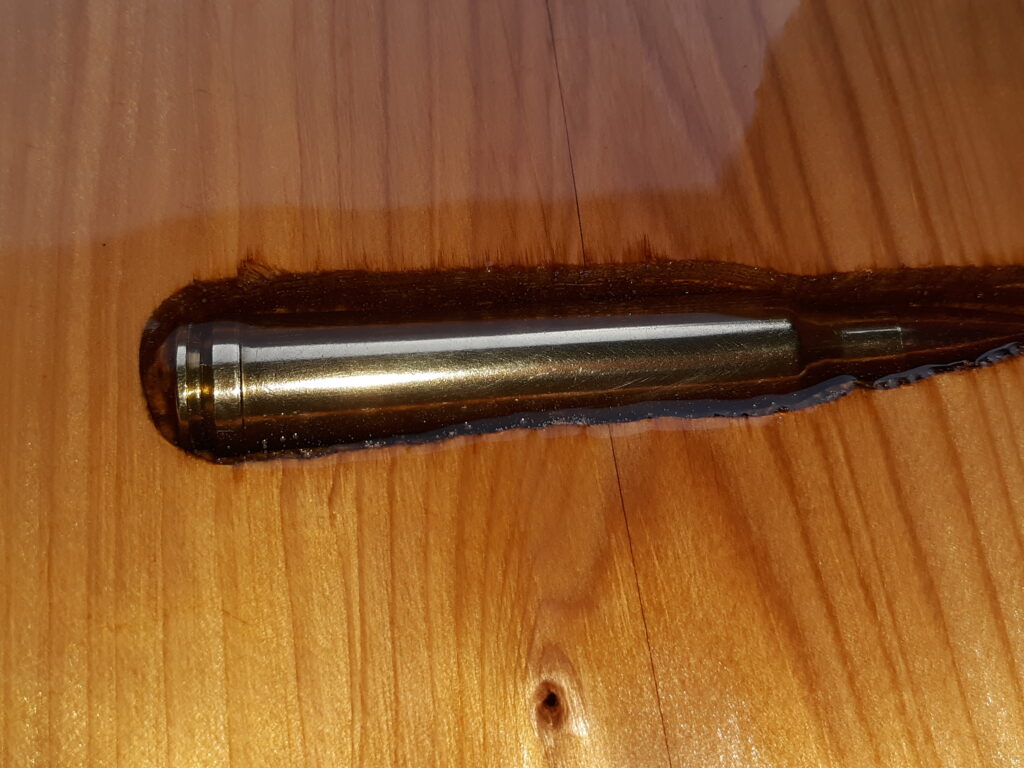
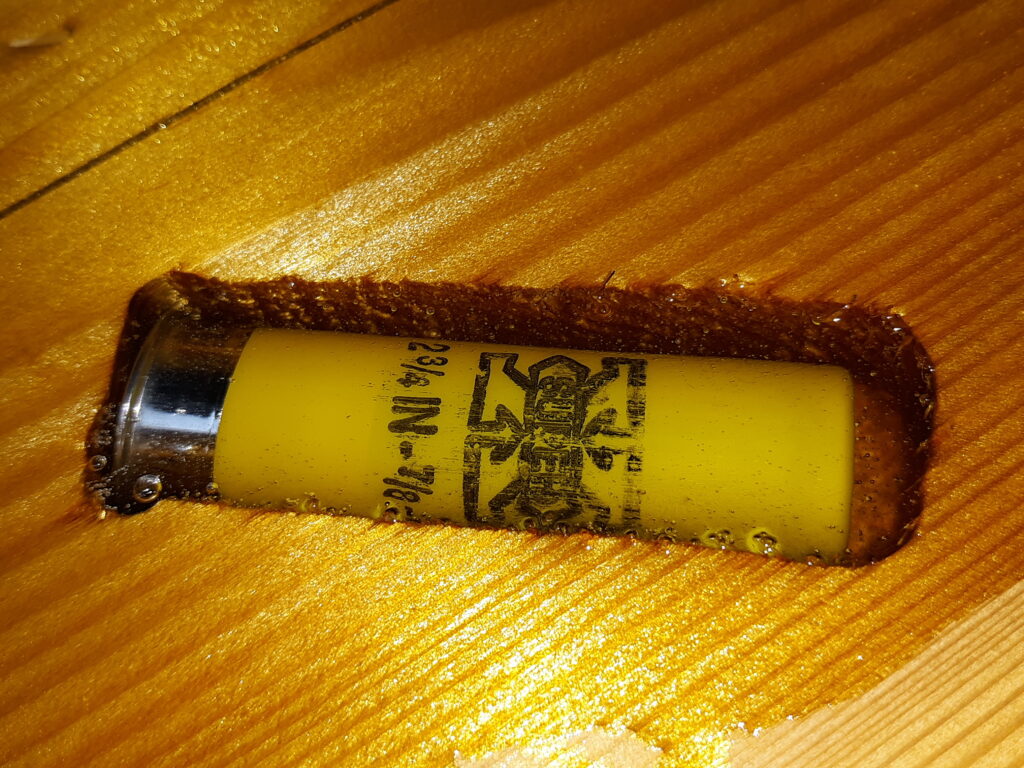
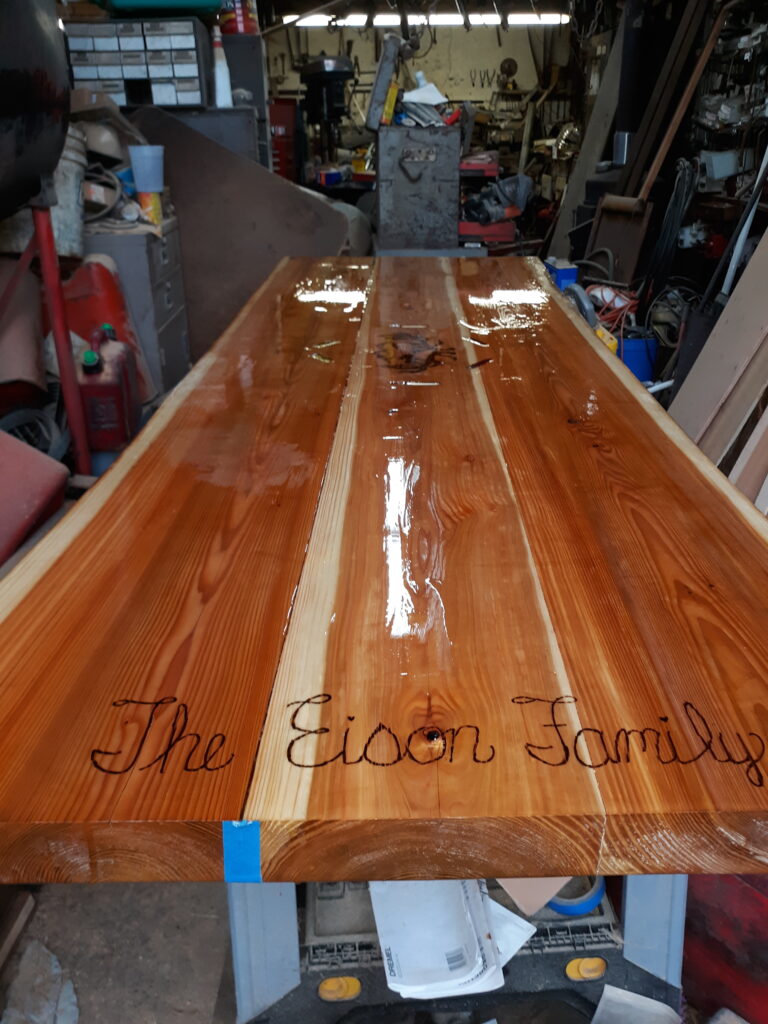
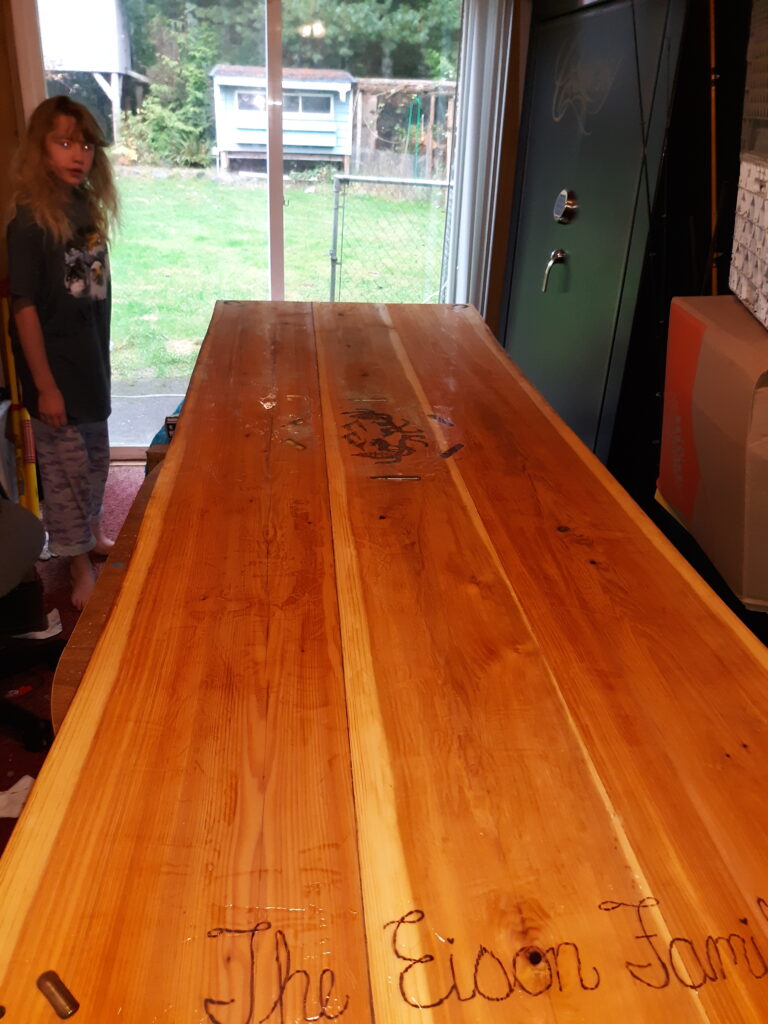
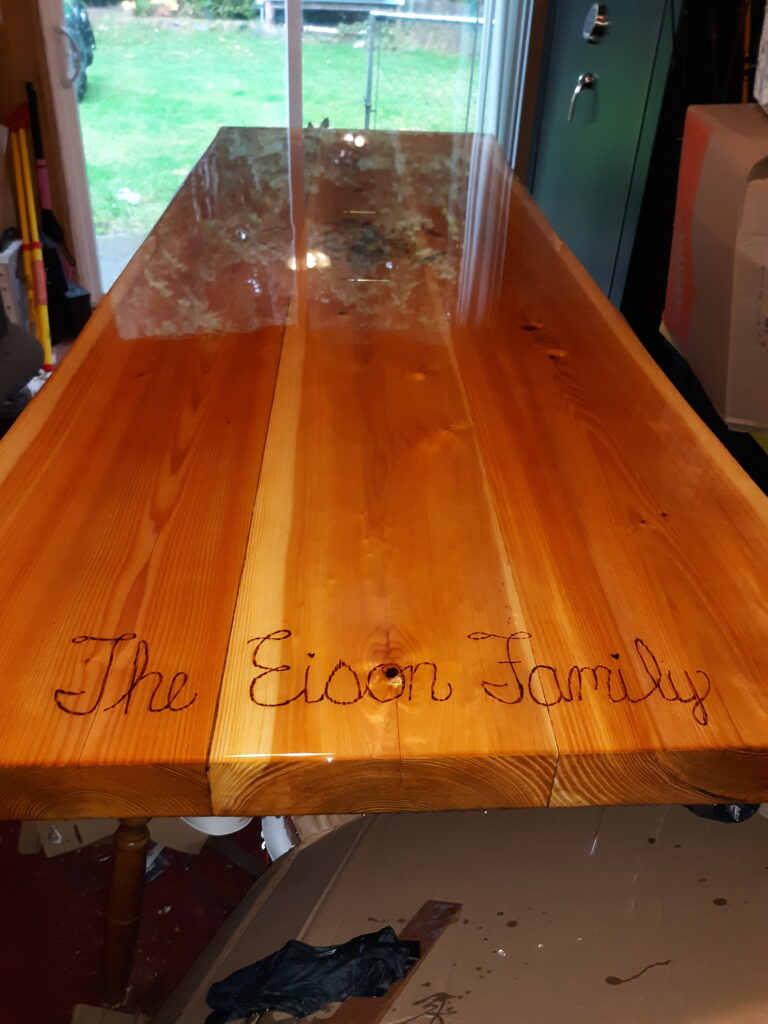
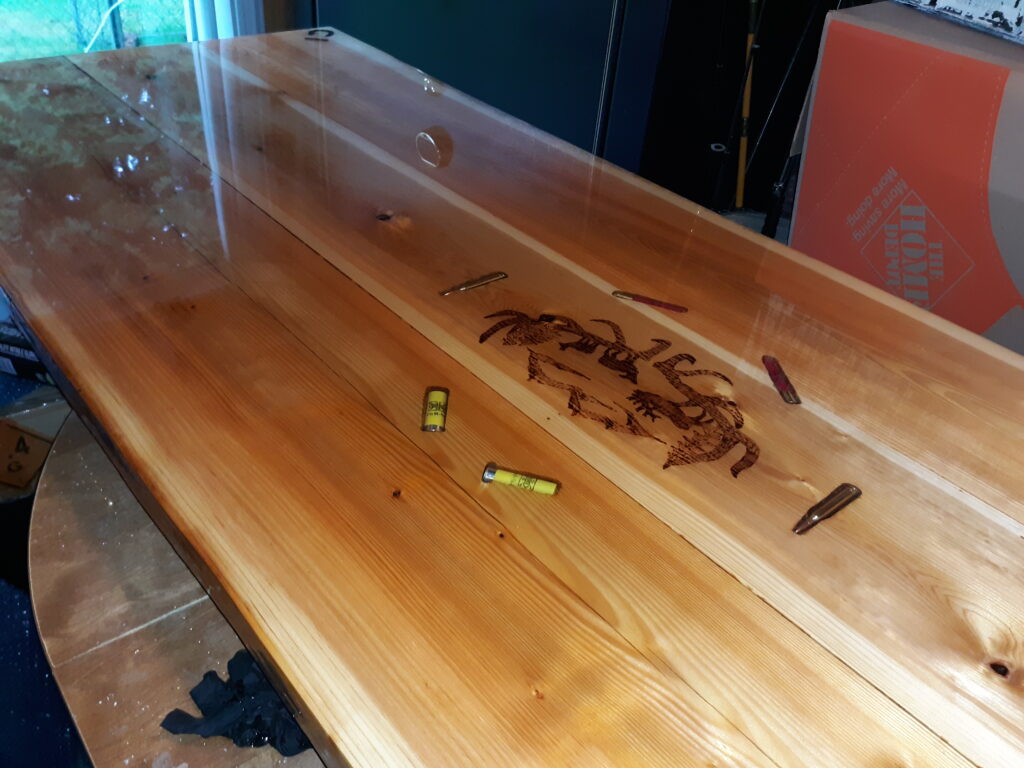
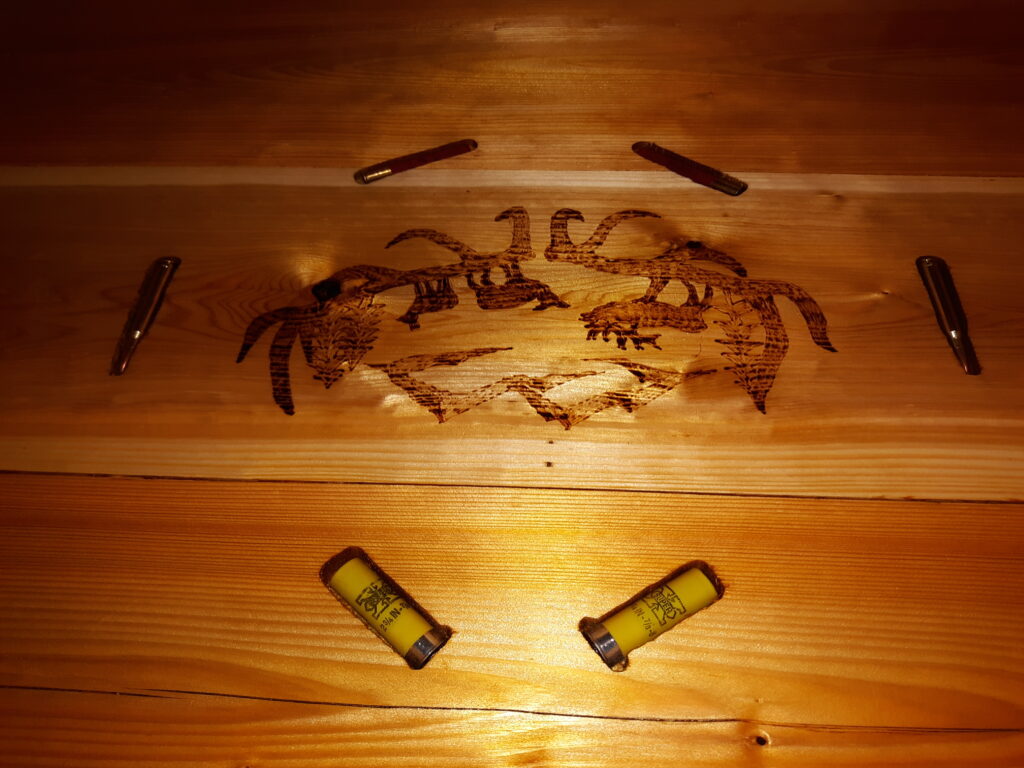
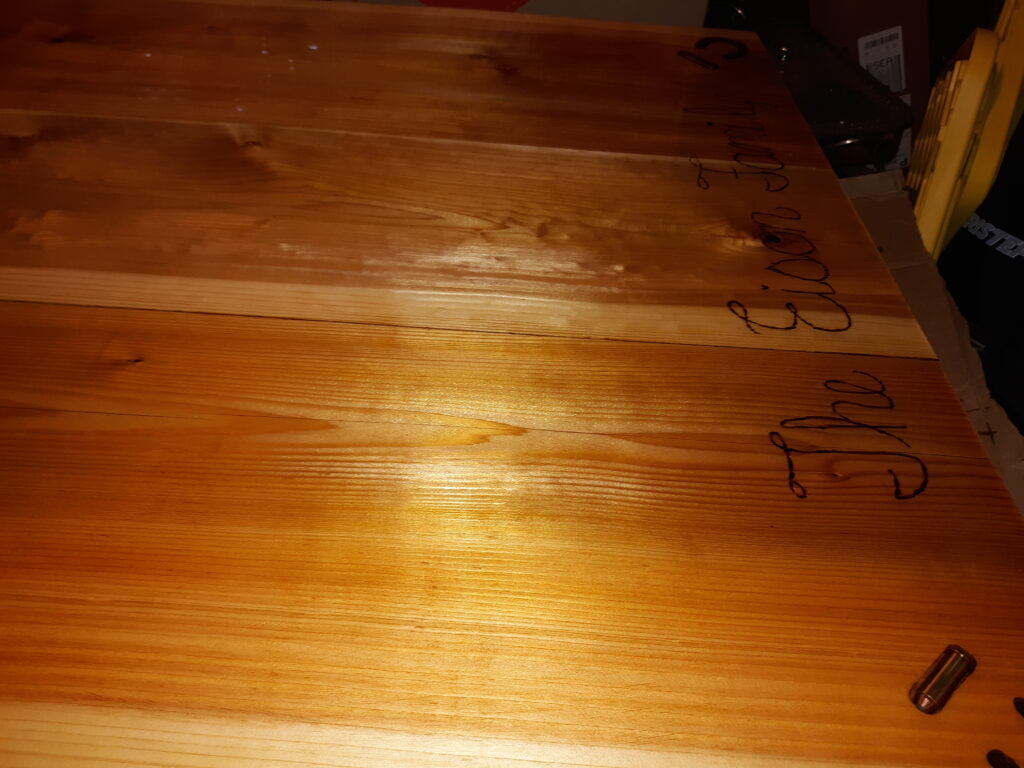
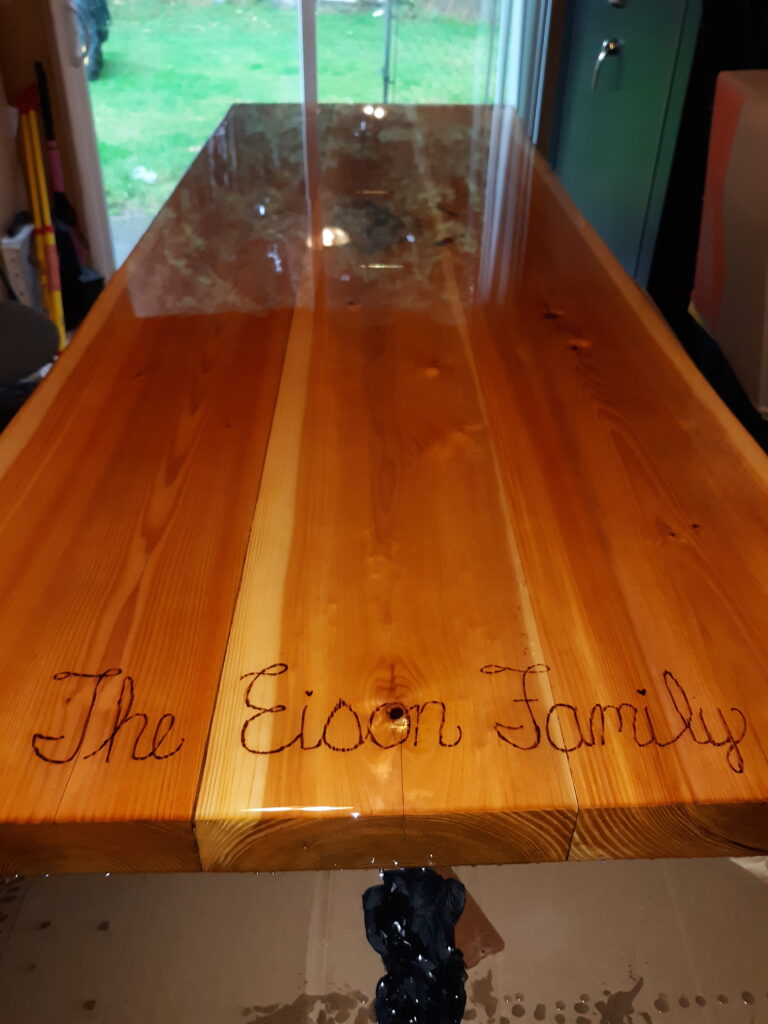
We decided to personalize the table to our family by wood burning patterns into it and inlaying some various rounds of ammunition and miniature horse shoes. My wife designed and wood burned the centerpiece and other patterns into it. The miniature horse shoes and ammunition were spread around in patterns at various places on the tables after using a router to create inlay areas for them. These were very fitting seeing how much we love hunting, shooting, and horses for Jessica anyway. It was a pain to take all these extra steps but it will be well worth it when it’s done.
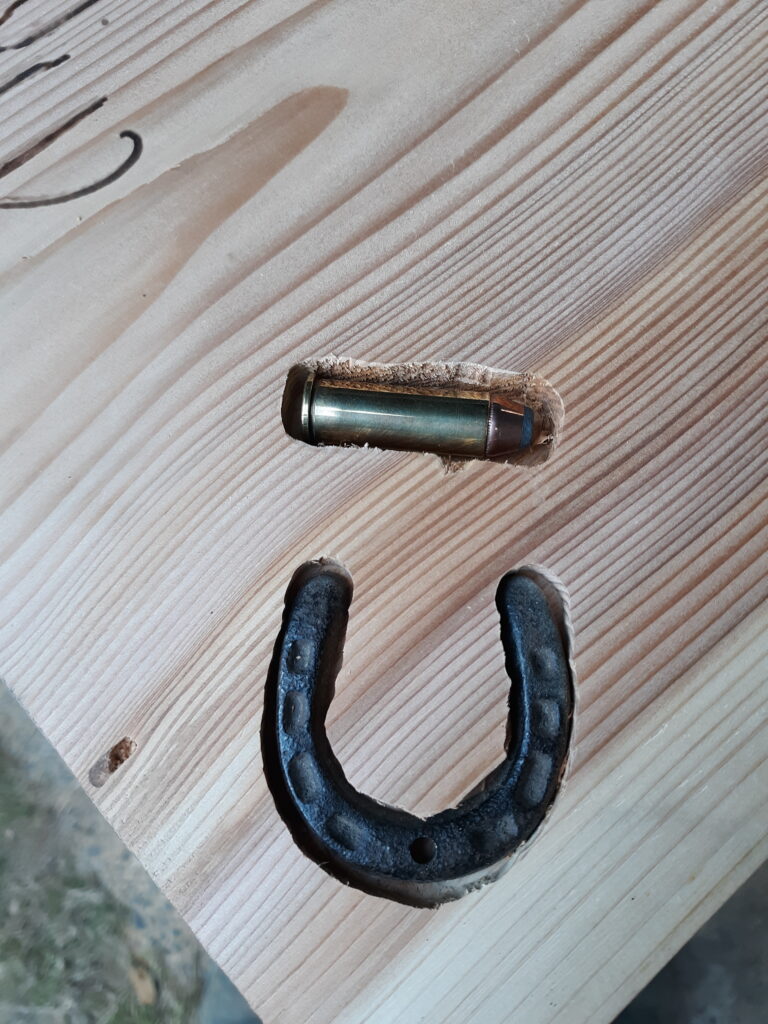
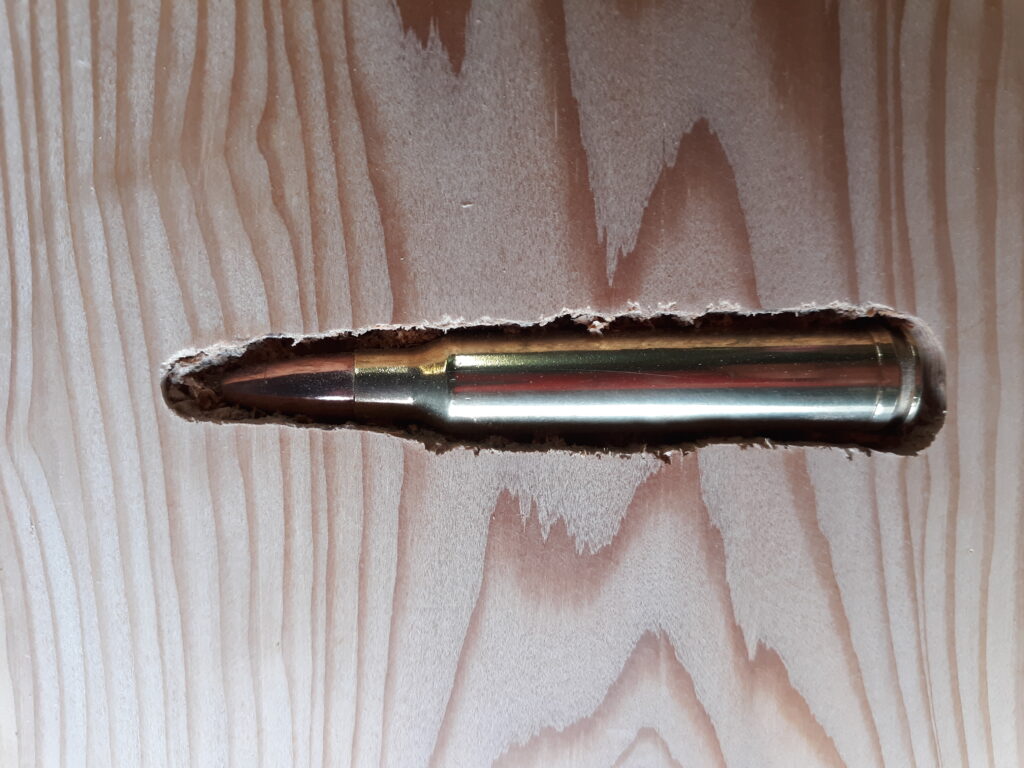

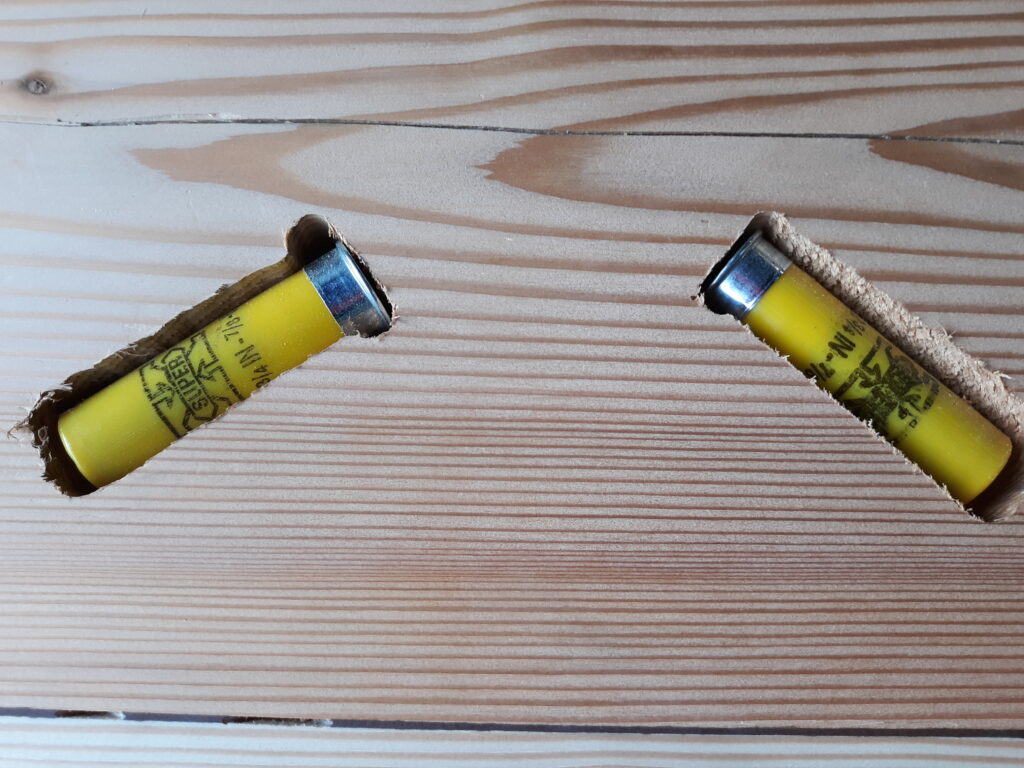
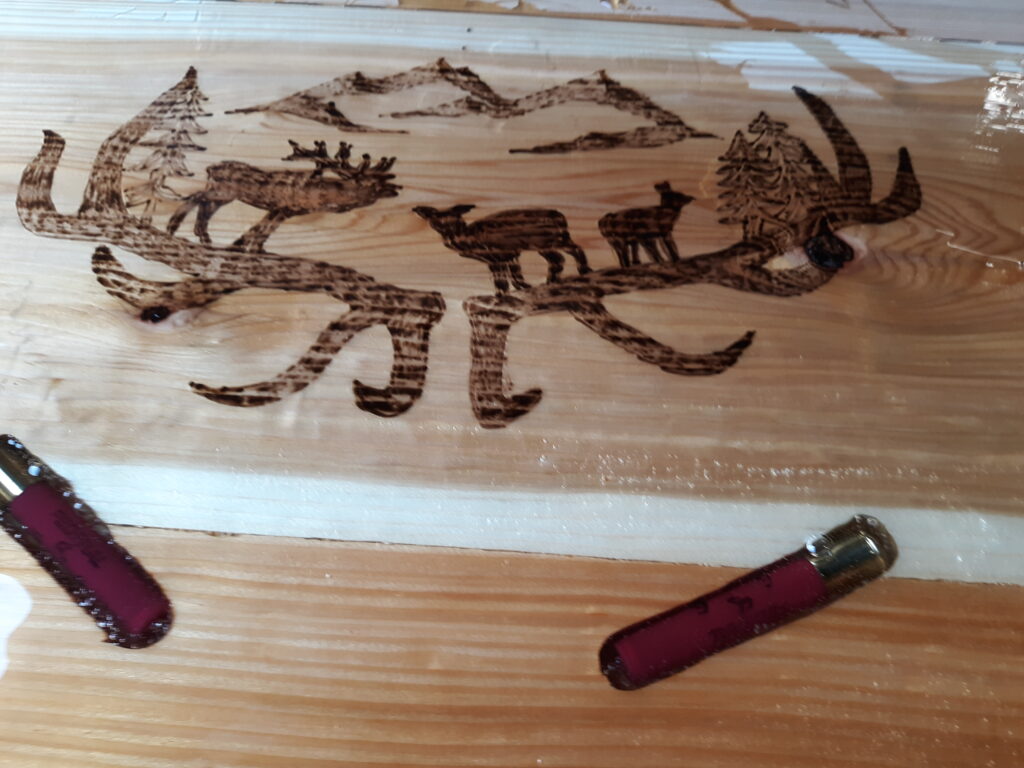
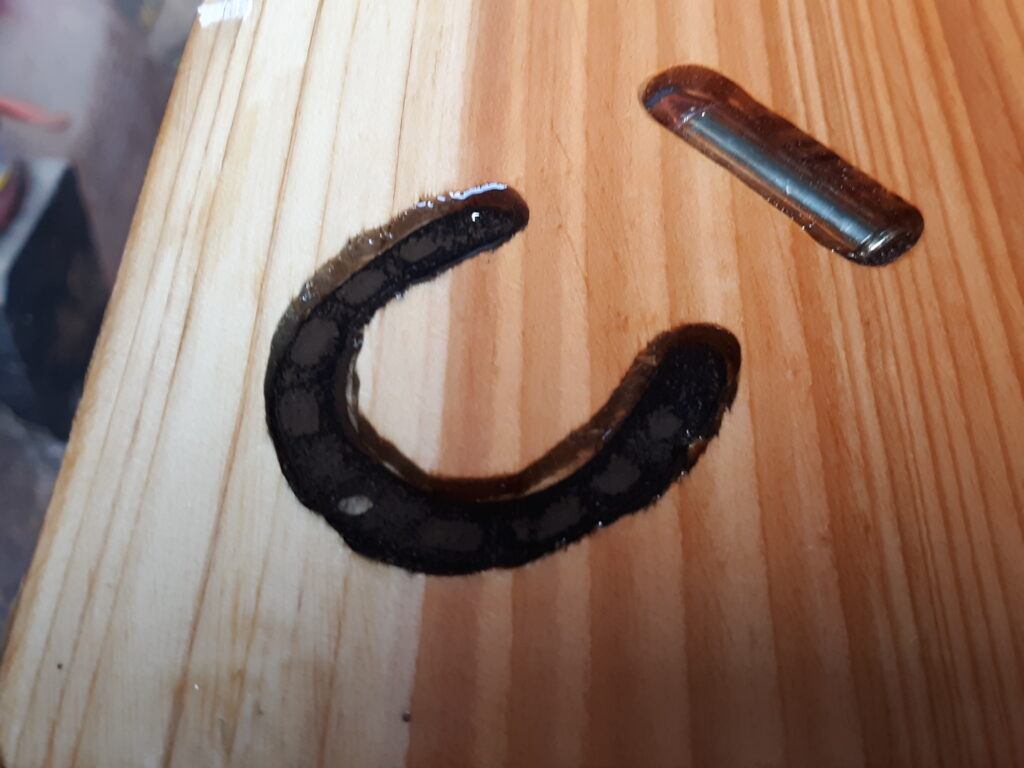
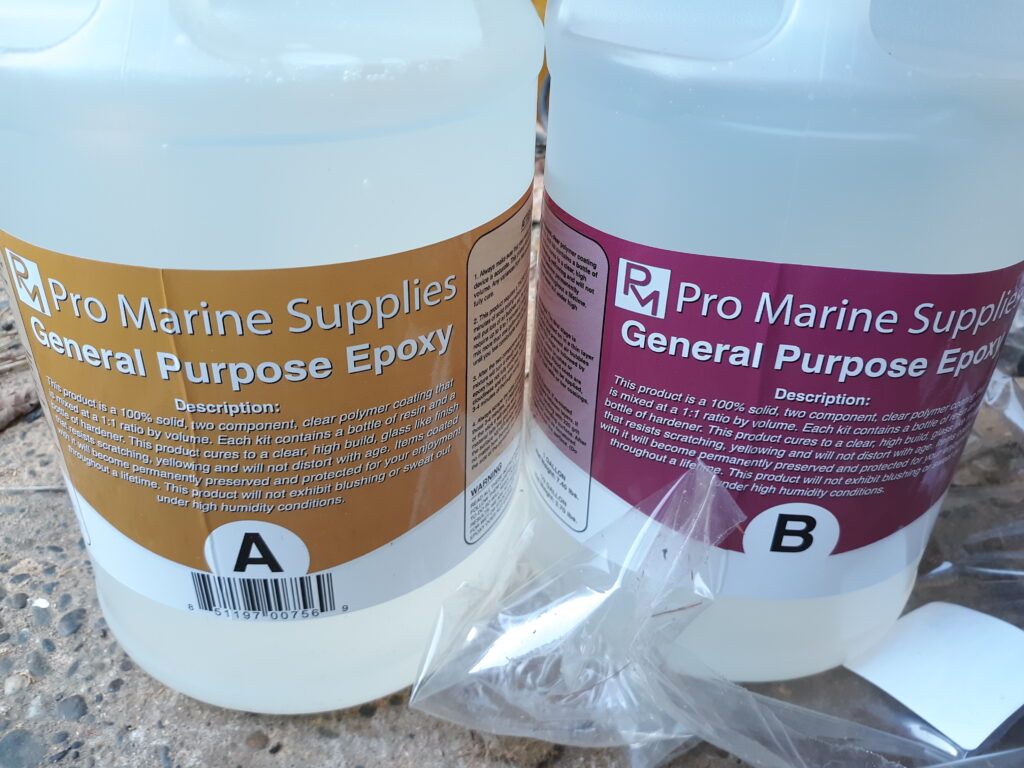
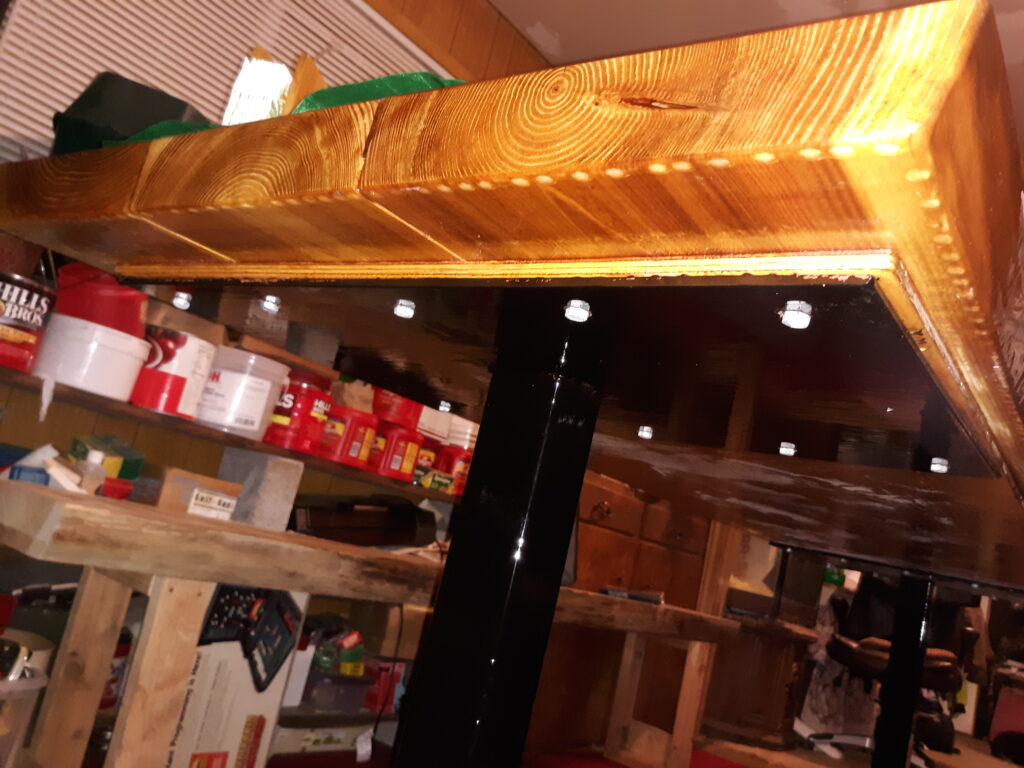
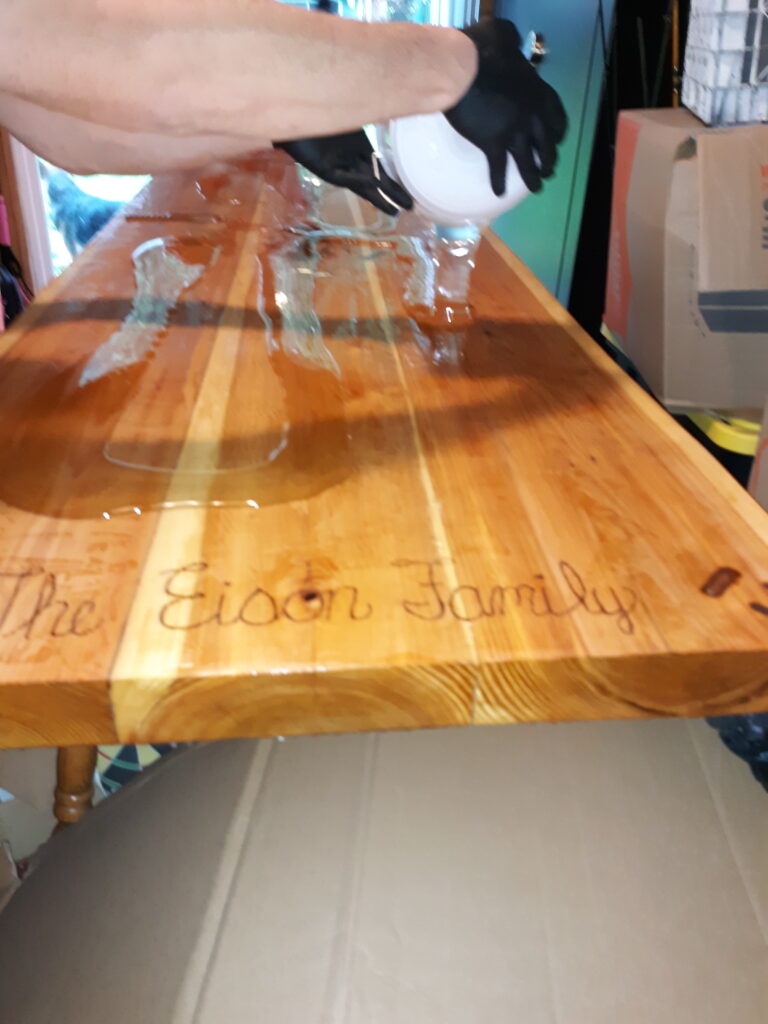
A two-part marine grade epoxy was chosen as it provides an excellent gloss finish that is nearly impervious to any cleaning agents that would ever be used on the table. It can also be refinished easily later after any scratches get too bad and only the shine only gets deeper with every coat. The cartridges and other items were placed in their respective spots and covered in epoxy. The rest of the table got a sealing coat of epoxy too in preparation of a future final coat. Over the next few days more epoxy was added to the inlayed areas and table surface until I was all one even depth. A light sanding with 400 grit sandpaper helped keep everything level and a propane torch was used to remove any bubbles in the epoxy during the pours. One pro tip for this is to make sure you have enough epoxy mixed to do the entire pour as you will not have time to stop and mix more once you get started.
After the base coats of epoxy had dried, I did a final light sanding of all the surfaces and triple checked for any blemishes that might transfer through to the final finish. An acetone covered rag is the quickest and best way to remove any sanding dust so make sure the surface is 100% clean before proceeding to the final pours. I planned on doing two final coats to add depth to the finish so I mixed and poured the first of those. Latex gloves were used to coat the sides and ends of the table with the overflow surface epoxy. I took extra time and asked everyone else to help find any bubbles so they could be removed as they formed. The table sat overnight and I repeated this process the next day to get the depth of finish that I wanted.
Since these were thick pours, I allowed the table to sit for three days before doing anything else with it. The bottom edges had epoxy drips so I sanded those off and recoated those areas with another coat of polyurethane. After that was, I dry I attached the legs using about twenty 2” lag bolts around the edge of the steel plates at both ends of the tables. The table was extremely solid, and heavy, after the final assembly and did not wiggle at all so the over-engineering had worked as planned. We finished just in time to try it out on Thanksgiving Day for a family dinner. It is now a heavy-duty table, meat processing bench, and family heirloom that will be passed down to one of our kids eventually.