Traditional Indian Salmon Bake
Salmon have been traditionally cooked using this method from time immemorial so we felt this was important to pass along to our children. We are enrolled Quinault Indians (FYI, if someone claims to be Indian but does not have either an enrollment card or CIB then they are not recognized as Indians. The infamous my grandmother was an Indian Princess or all the records were destroyed in the courthouse fire does not cut it) and still live-in part of the Quinault’s ancestral homelands so we are blessed to have these opportunities and resources at our doorstep as many people never had chances like this in their lives and seeing pictures of it are as close as they may ever get to doing this. This method can be used to cook any salmon or even wild game meat for that matter, but we typically only use if for cooking sockeye (Quinault Blueback) salmon now.
The sockeye salmon (Oncorhynchus nerka), also called red salmon, kokanee salmon, or blueback salmon, is an anadromous species of salmon found in the Northern Pacific Ocean and rivers discharging into it. This species is a Pacific salmon that is primarily red in hue during spawning. They can grow up to 2’ 9 “in length and weigh 3–15 lb. Juveniles remain in freshwater until they are ready to migrate to the ocean, over distances of up to 1,000 miles. Their diet consists primarily of zooplankton. Sockeye salmon are semelparous, dying after they spawn. Some populations, referred to as kokanee, do not migrate to the ocean and live their entire lives in fresh water.
This method uses radiant heat from the fire to do the cooking and the fire itself also imparts a slight smoke flavor to the fish or other cooked food making it that much better. This is a cooking method because the temperatures are too high for smoking and the fish is not placed directly in the smoke so it is a completely different method. Smoking fish is done at low temperatures with smoke so use the proper techniques for smoking if that is what you are wanting.
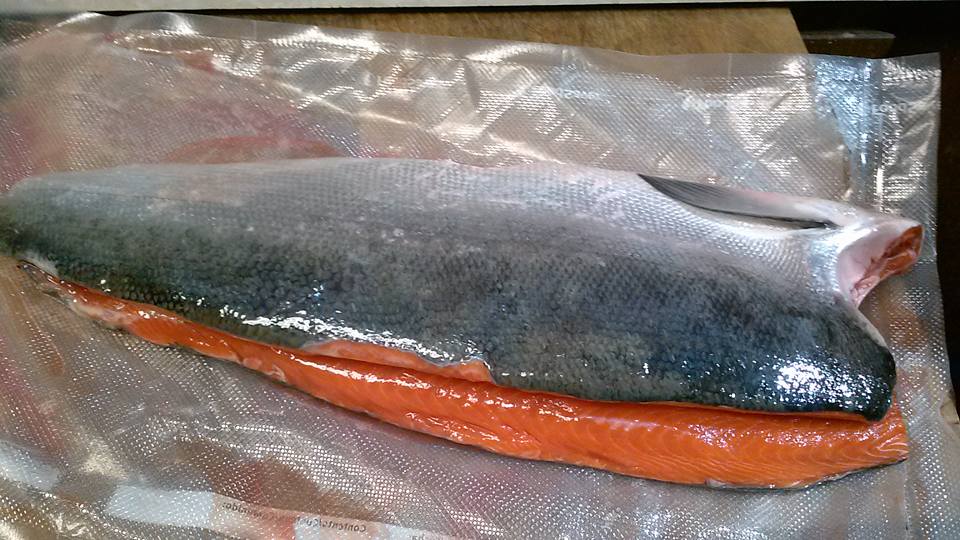
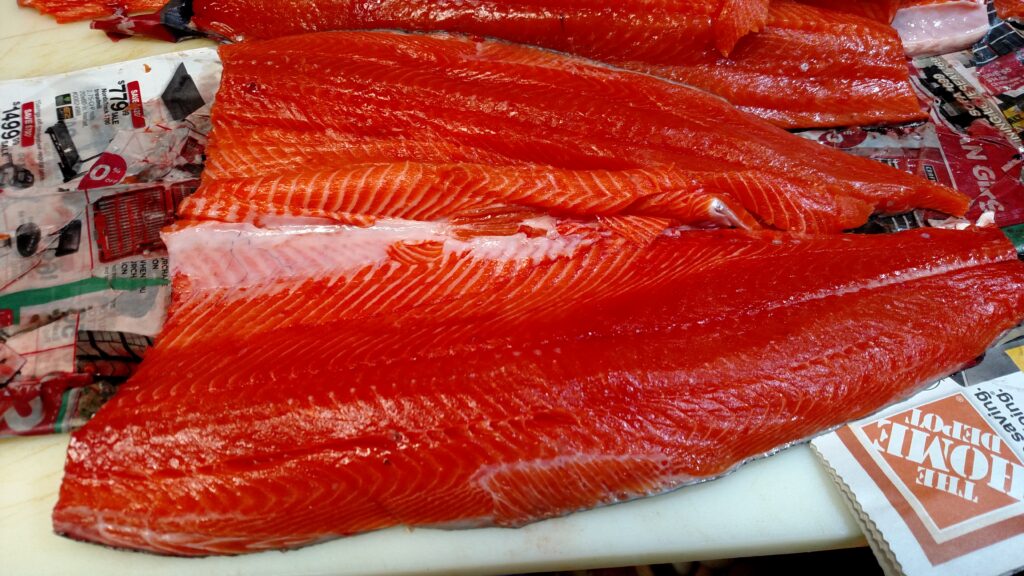
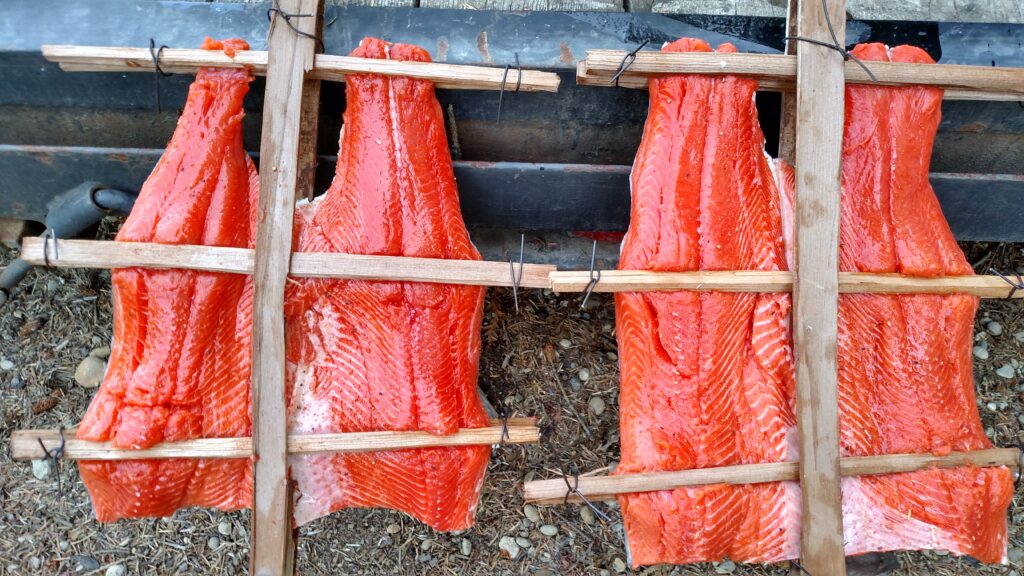
To start with you need a fresh salmon and some cedar sticks. The salmon should be butterfly filleted where the filleting process started along the backbone and was filleted towards the belly to make one large fillet from the fish rather than two separate ones. The smaller half fillets can also be used if needed, but you will need to take extra steps to prevent them from sliding down as the center section of the butterfly fillet acts as a stop when it’s placed in the “Fish Stake”. I prefer to add Johnny’s Seasoning salt to the fillet the day before so the flavors can soak in. The fish is cooked upright so anything on the surface will drip off so keep that in mind as you choose how to season your fish.
Western Redcedar is what we use to make our “Fish Stakes” out of. It splits easily so it is easy to work with and is abundant locally so these qualities have made it the wood of choice for centuries. The center portion of the fish stake is simply about a 1 ½” square piece of split cedar about 3 ½ feet long. One end is sharpened to stick into the sand or ground and the other is simply split or has a notch cut in to that the fish and supporting wood can be slid into. There are two methods to make this depending who what kind of tools you have. The first way to do this is to tie rope or twist bailing wire around the stake about 2 feet from the top before carefully splitting it down the middle. The other method, which is what we use, is to use a bandsaw to cut a 1/4’” section of wood out of the middle for about 2 feet down from the top. I know these methods are not completely “Traditional”, but they are way easier and I am sure my ancestors would have used them too if they had a bandsaw sitting in the back corner of their longhouse. The metal bailing wire is not exactly traditional either, I know, but it makes life way easier and you don’t have to worry about it getting too hot and melting. It should never catch on fire either way as you should not be placing your fish close enough to the fire where that ever becomes an issue.
The next step is to split some small ¼” pieces of cedar about 20” long that will become the cross-supports for the fish to hold it open during the cooking process. You need at least 6 to 8 pieces depending on the size of your fish as you will be using two pieces for each support, one on the front side, and one on the back side per row. Having a couple extra on hand will also be a great idea as they can break easily if you try forcing the fish into the center of the stake too hard. You will also need bailing wire or twine sections long enough to tie each end of the supports as well as the top of the stake.
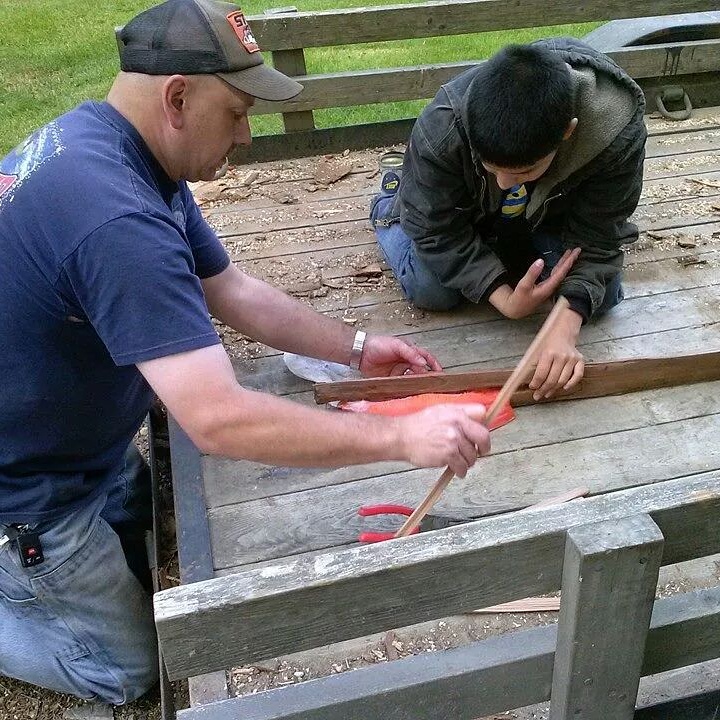
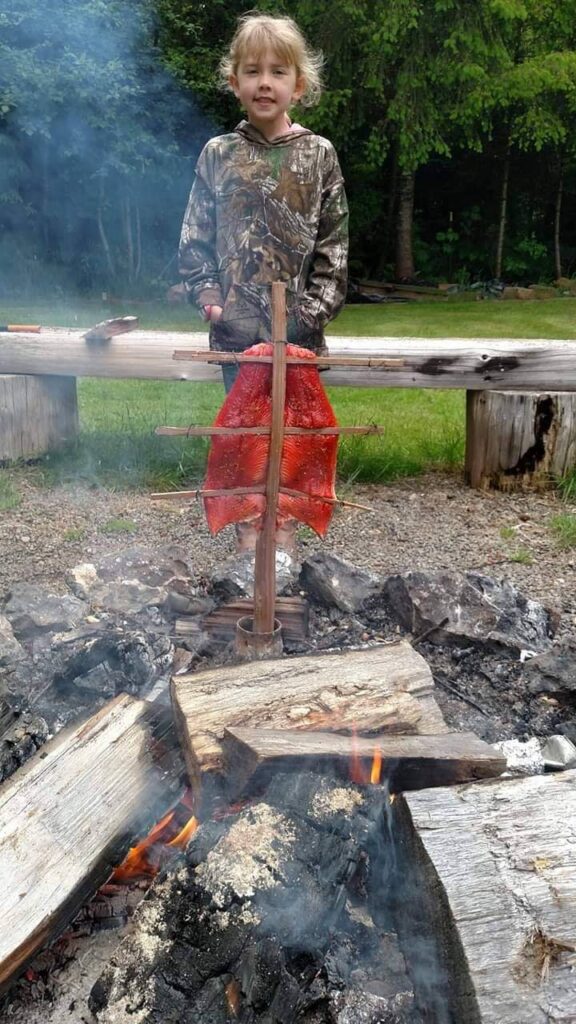
Once you have all of your fish stake materials prepped you can move onto mounting the fish in the stakes. The head side of the fish should be facing downward as that has the thickest portions of meat that will need the most time to cook. I was teaching my son how to do this is some of these photos so we accidently turned one upside down by accident while I got sidetracked explaining the process to him, oops it still turned out good and I had to adjust the stick angle to compensate so it will work out still if you mess up. A second person is helpful as you’re learning this process, but it can easily be done without one if you can keep something wedged into the bottom of the split while sliding the fish in. I prefer to add the side supports first and they consist of the two pieces that are mounting on opposite side of the fish to sandwich the fish in between them. The ends out past the fish are tied together using the bailing wire or twine with only light pressure. The idea is to keep the fish from sliding down using the combined friction of all these cross supports and the center section without actually squishing the fish too much. The fish meat will start “Flaking” as it cooks to just a little pressure is needed to compensate for this. Once you have your 3 or 4 cross-supports tied in place slide the entire fish down the center split or cut section of the main stake post until the bottom-most cross support is pinched tight or the fish itself bottoms out on the stake bottom. Pull the other end of the fish gently towards the top of the stake to make it is stretched out then pinch the main stake back together and tighten it with the bailing wire or twine. The top end of the stake must be tied tightly to keep pressure on the fish to keep it from sliding down the center of the stake.

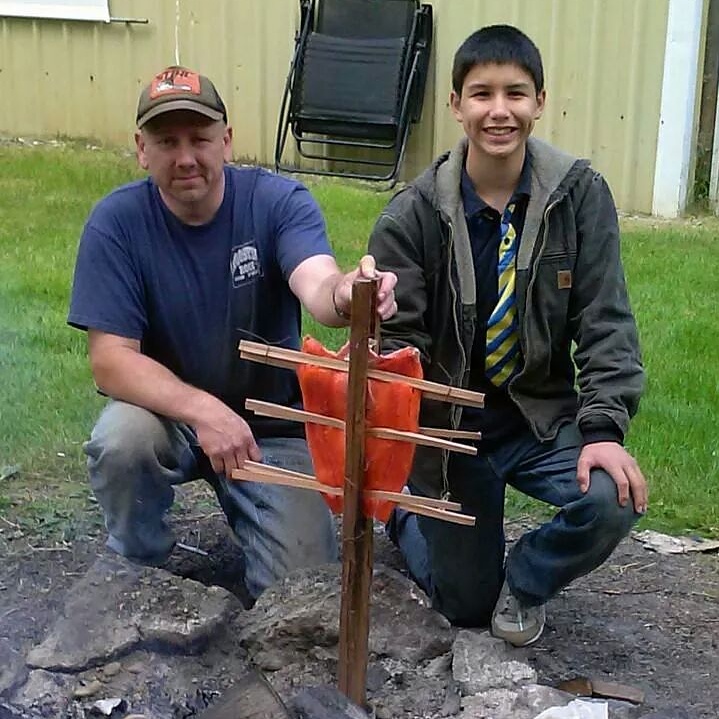
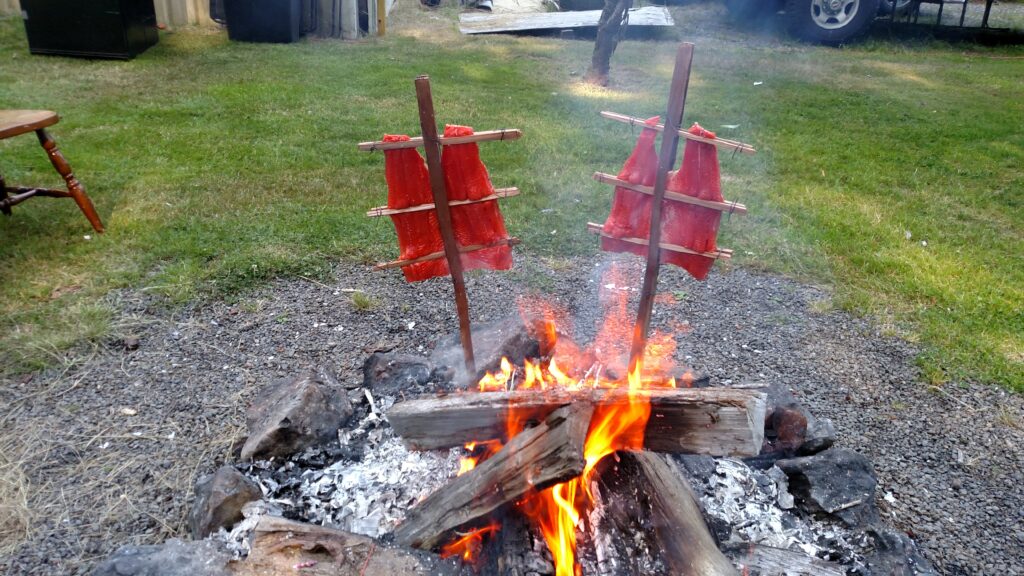
Next you want to build a fire if you have not done so already. Firewood choice is critical as you do not want to use any wood that imparts a bad flavor so alder and maple are what I use. Sand would be the ideal choice for this operation as you will have to push the stake into the ground, but we use a piece of metal pipe buried in the fire pit to place the stake into. The pipe is oversized so we can angle the stake and shim it to prevent it from moving so use whatever you have on hand that works for you. Once you have your fish stake placed in the ground or into the pipe you can build your fire up to provide radiant heat to the fish to begin cooking. I always place my fish where the predominant winds will also allow smoke to blow onto occasionally to add some genuine smoked flavor. The ideal distance from the fire varies obviously as the fire shrinks and grows so about two feet away from the edge of the fire is a good starting point. I use a shovel to move the fire rather than trying to move the stick since I use a metal pipe instead of sand. The wooden fish sticks should never start smoldering or burning at any point as they idea is to keep the heat down to about 350 degrees so the fish cooks thoroughly instead of just flash cooking the outside of it while leaving the inside raw.
Traditional fish cooking
You will have to turn the fish around several times so the back of it cooks to and this is not a cooking method that you start and walk away from so keep that in mind when you start it. You will have to keep adding wood to the fire to keep the heat adjusted along with turning the fish around every five minutes or so. You can carefully feel the surfaces of the fish to see how much heat it is getting and adjust the fish angle and fire size as you go. The fish meat will start getting “Flakey” when it is done and a quick check with a thermometer in the thickest areas of the fish will confirm that it is done. Once it is fully cooked loosen the wire or twine from the top of the stake and gently slide the fish out onto a platter to let it rest for a few minutes before removing the small supporting sticks. The small sticks on the flesh side generally have some meat stuck to them that makes very delicious snacks while you are waiting to cut the main fish up into dinner sized portions. This will be the tastiest salmon that you have ever had and you’ll look forward to cooking them this way every time the weather gives you an opportunity to!
I was curious if you ever thought of changing the layout of your blog? Its very well written; I love what youve got to say. But maybe you could a little more in the way of content so people could connect with it better. Youve got an awful lot of text for only having 1 or 2 images. Maybe you could space it out better?
Thanks for the suggestions, some stories have different formats depending on whether my wife or I write them so typically mine are not formatted as well for sure. She just showed me some formatting tricks so any of my new stories should be spaced out a little better.