Blackberry Jelly
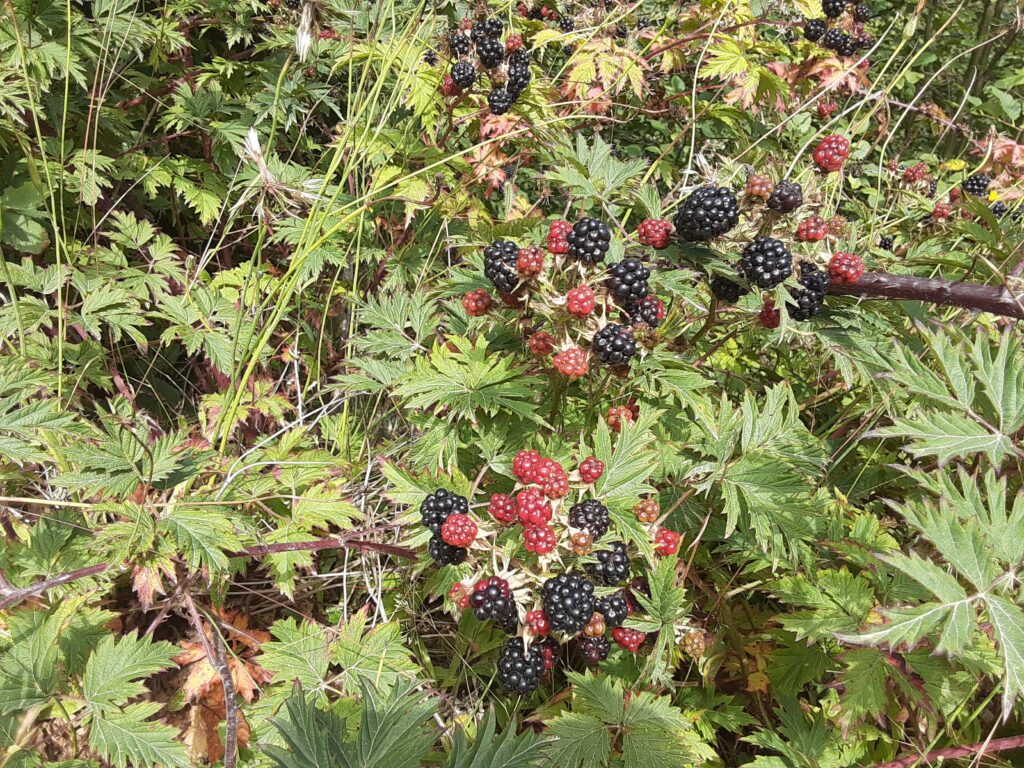
Making Blackberry Jelly is very easy to do provided that you have access to the blackberries. We are very blessed to have a huge abundance of berries around our house so that is not a problem for us. Picking Blackberries is a little more difficult as the thorny vines are not user friendly whatsoever and you can count on at least one getting you every time you go, but it is well worth the effort as they are large berries so it you do get a good reward quickly for your efforts.
There are two separate jelly making methods, freezer jelly and regular jelly. We have only tried making freezer jelly once and went back to making regular jelly so it could be canned to store for later. Making jelly the regular way is a lot more work, but it is shelf stable once it’s canned so it is well worth it. We also can blackberry pie filling at the same time as it just involves making a filling as usual and canning it instead. Both canning times are the same so it’s easy as long as you have everything set up for doing it already. We always make extra for Christmas presents and other special occasions.
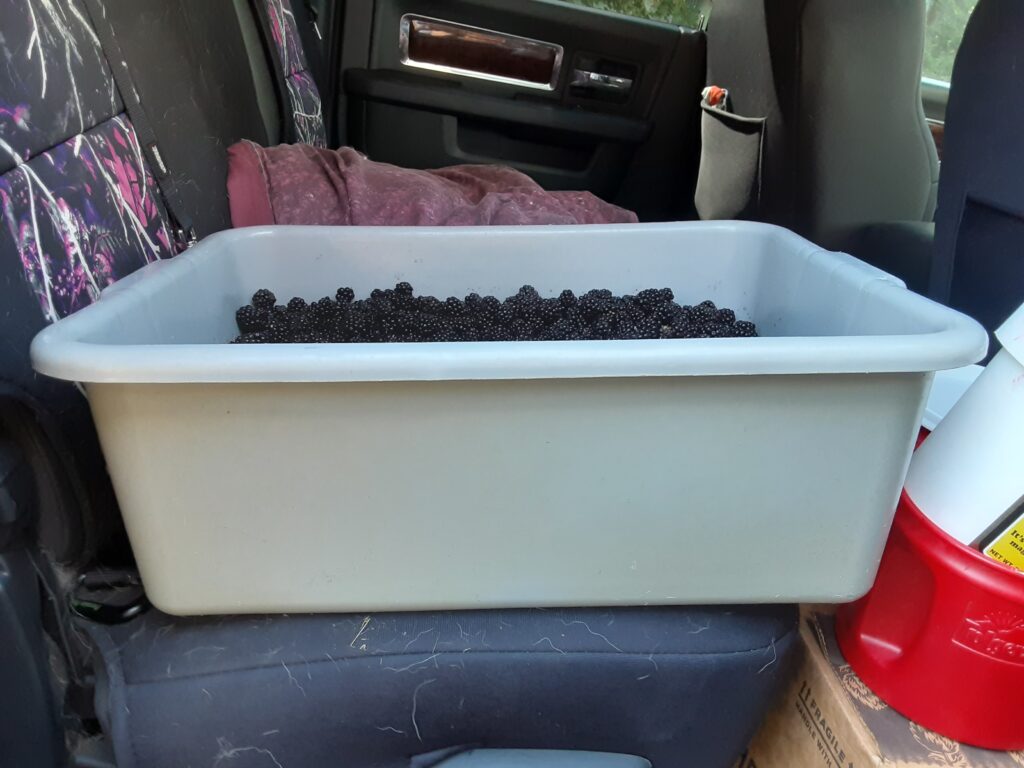
After you have picked a sufficient quantity of berries for the batch size you want to make you need to wash them to remove any bugs, dirt, or other things that may be on them. We have found that it is a 1:1 ratio for gallons of berries to gallons of jelly. We usually try to make five-gallon batches as there are some years when the heavy rains come and destroy the berries before they can be picked so we have a year’s worth stocked up just in case. Let the berries drip dry after washing before continuing onto the next step.
Since jellies are seedless you need to use a juicing method or a screen to remove the seeds. The most common ones are the steam juicer and the electric juicer with each having its own advantages. The steam juicer yields more juice but takes a lot longer to use. The electric juicers are way faster, but you get more of a juice concentrate than juice so you will have to add water to it before cooking. We bought a used electric juicer from a “Swap and Shop” page for $20 and it was one of the best investments we ever made for jelly. We do have to clean the screen once per gallon of berries and empty the pulp bucket, but we never had a seed sneak through yet. It leaves some juice in the pulp so we did try running it back through once and that was the sourest part of the berries so we never did that again and started adding water to the concentrate until it reached a thick juice consistency.
Prepare your canning jars, lids, bands, and canning pot before starting the cooking process. We use quart jars primarily and make sure you keep a few smaller jars ready too as you always seem to end up with a pint and half pint of jelly that you won’t have room for so that is when you will need these jars. You are guaranteed to need them if you don’t have them ready as “Murphy’s Law” is and always will be in effect and the surest way to test that theory is to not be prepared.
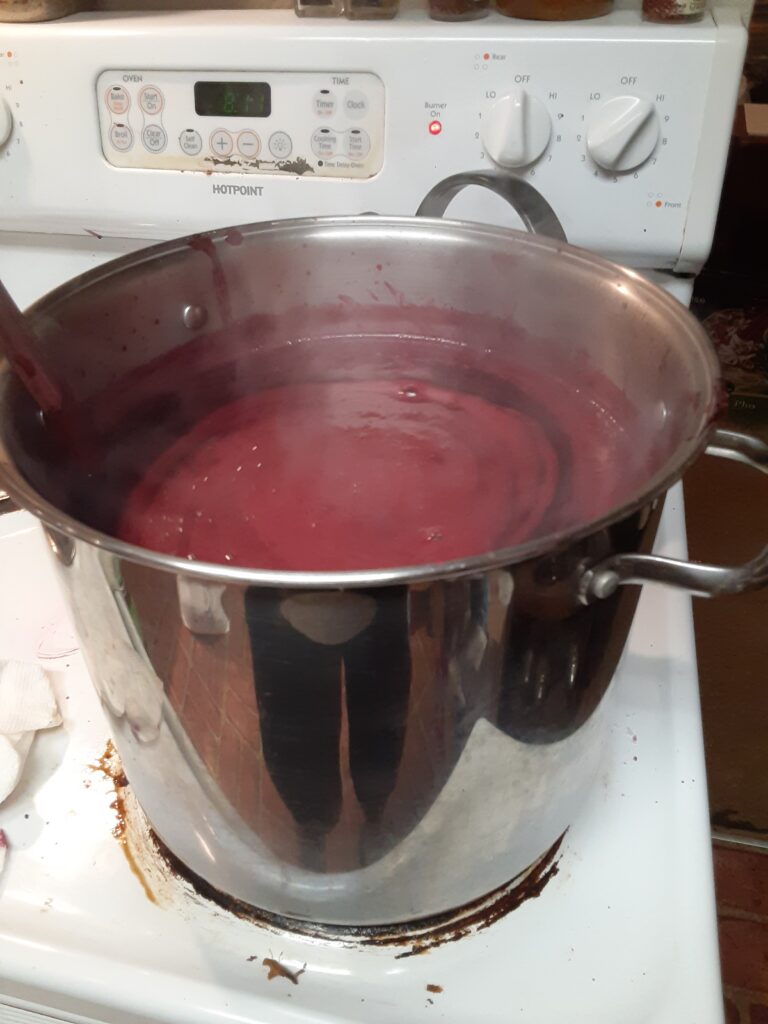
Add your juice, pectin, and lemon juice into a large pot and heat it to a boil. One word of caution on this that I haven’t seen mentioned anywhere is to only fill the pot to 50% capacity as it will boil over later when you add sugar if you don’t leave enough room. That definitely make a huge sticky mess to clean up so be forewarned. Once the juice is boiling add the sugar and bring it to a boil while stirring constantly as it burns easily. Sugar is the preservative so use the recommended amount found in the recipe that you want to try. Shut the heat off after it boils for one-minute and test it to make sure it jells by dipping a spoon into it. It should turn to jelly as soon as it cools down for a few seconds and if not, more pectin is needed. Blackberries are naturally high in pectin so they are very forgiving for jelly making unlike many other berries and fruits.
Fill your jars leaving about ½” headspace. We have tried the recommended ¼” headspace and blackberry jelly seems to boil out almost every time so we adjusted that for blackberries. Place the lids and bands on the jars and put them in the water bath canner. Quarts need to boil for 20 minutes and we usually add a few smaller jars to the canner too so we let them cook the extra few minutes too. Once twenty-minutes are up, take the jars out of the canner and place them onto a cooling rack. Make sure they seal, which is evident when the lid pops down, and write the date on them. It is hard to keep track of which ones are new and which are old so this is a must. The jars that didn’t seal can be placed in the refrigerator so you can use them right away. We make our own jellies so that we know exactly what was in them, how clean the process was kept, and for a taste that doesn’t come from most jellies found in the grocery stores. We are picky on which berries we use and how good they are washed so quality control is very good.
